Introduction
This document provides step-by-step instructions on how to perform specific tasks using the Arrayent Configurator web application.
Configurator Overview
The Configurator is an Arrayent web application used for configuring the operation of the Arrayent Cloud, such as how the cloud executes email alerts, and performing system administration and development tasks, such as creating user accounts (“Customer Accounts”) or modifying device data models (“Device Types”).
Using This Guide
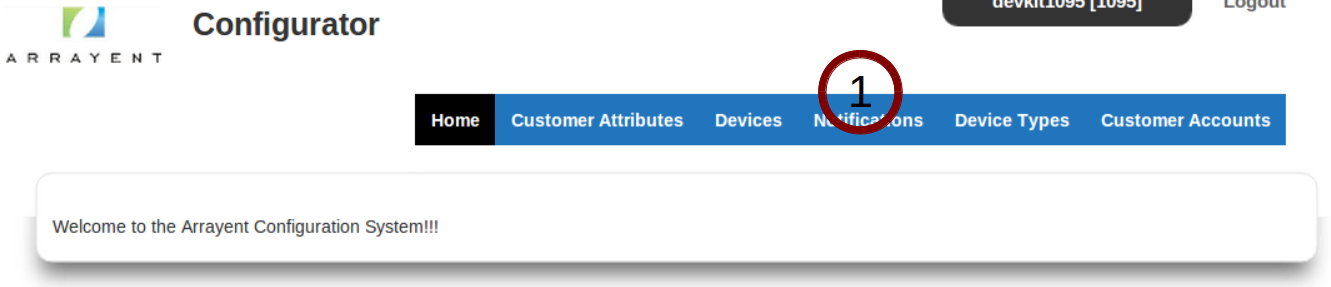
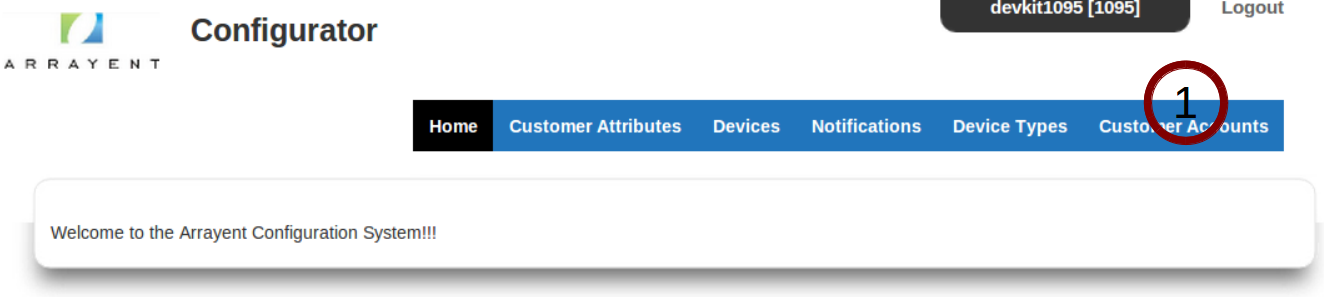
This guide is organized by “pages” of the Configurator. Each of the menu items in the navigation menu of the Configurator (Customer Attributes, Devices, Device Types, etc.) correspond to a page of the Configurator. Click the tab to access that page.
Each task explained in this guide is self-contained. You should be able to complete specific tasks just by following the directions explained in that section.
Accessing the Configurator
This section describes how to access the instance of the Configurator which is deployed on your Arrayent Cloud environment.
Locating the Configurator
The Configurator is available at the following location in every Arrayent Cloud environment: https://YOUR_SUBDOMAIN_HERE.arrayent.com:8081/Configurator To access the Configurator on your Arrayent Cloud environment, replace YOUR_SUBDOMAIN_HERE with your assigned subdomain.
Accessing the Configurator
- Open a web browser, such as Mozilla Firefox or Google Chrome, type in the URL to the address bar, and instruct your web browser to retrieve the web page.
Logging In to the Configurator
To log in to the Arrayent Configurator:
- Open a web broswer.
- Type in the URL to the Arrayent Configurator.
- On the login form enter your System Account Name and System Account Password and then click Login.
Customer Attributes Page
The Customer Attributes page of the Configurator enables you to add/modify/delete customer attributes in your Customer Account data model.
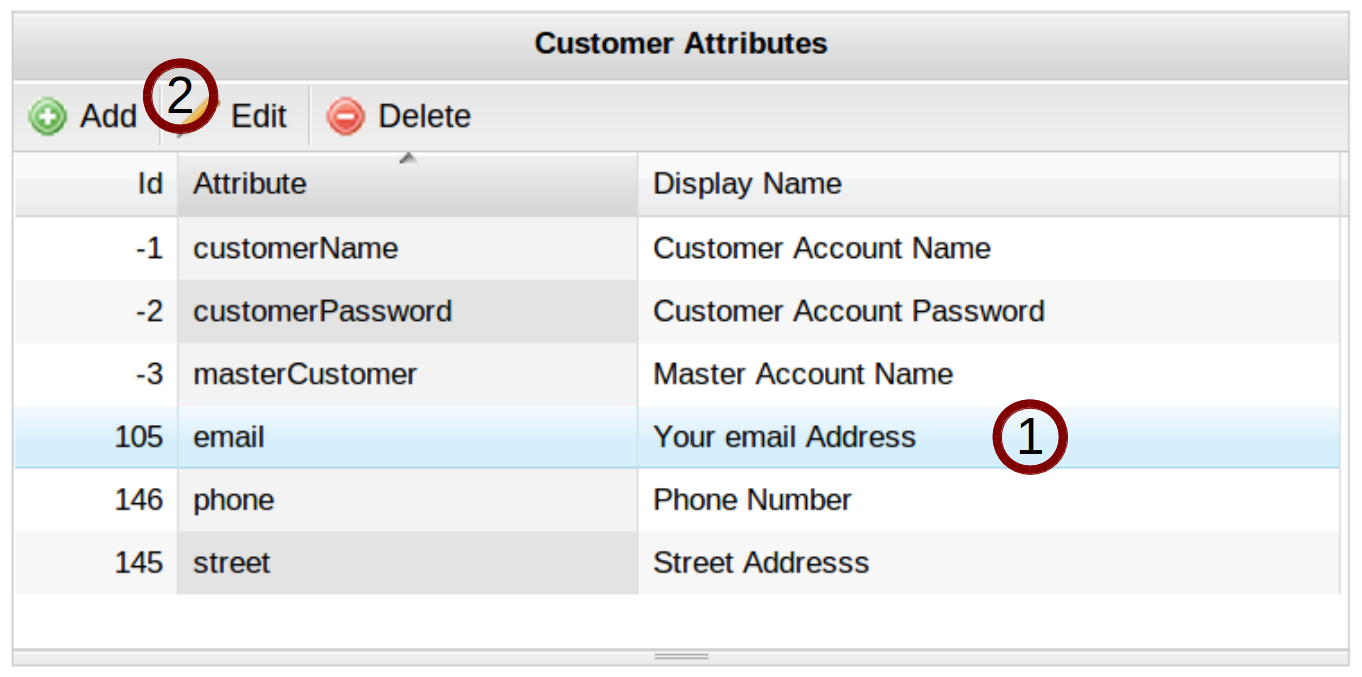
The table on the Customer Attributes page contains all currently defined user attributes in your Customer Account data model.
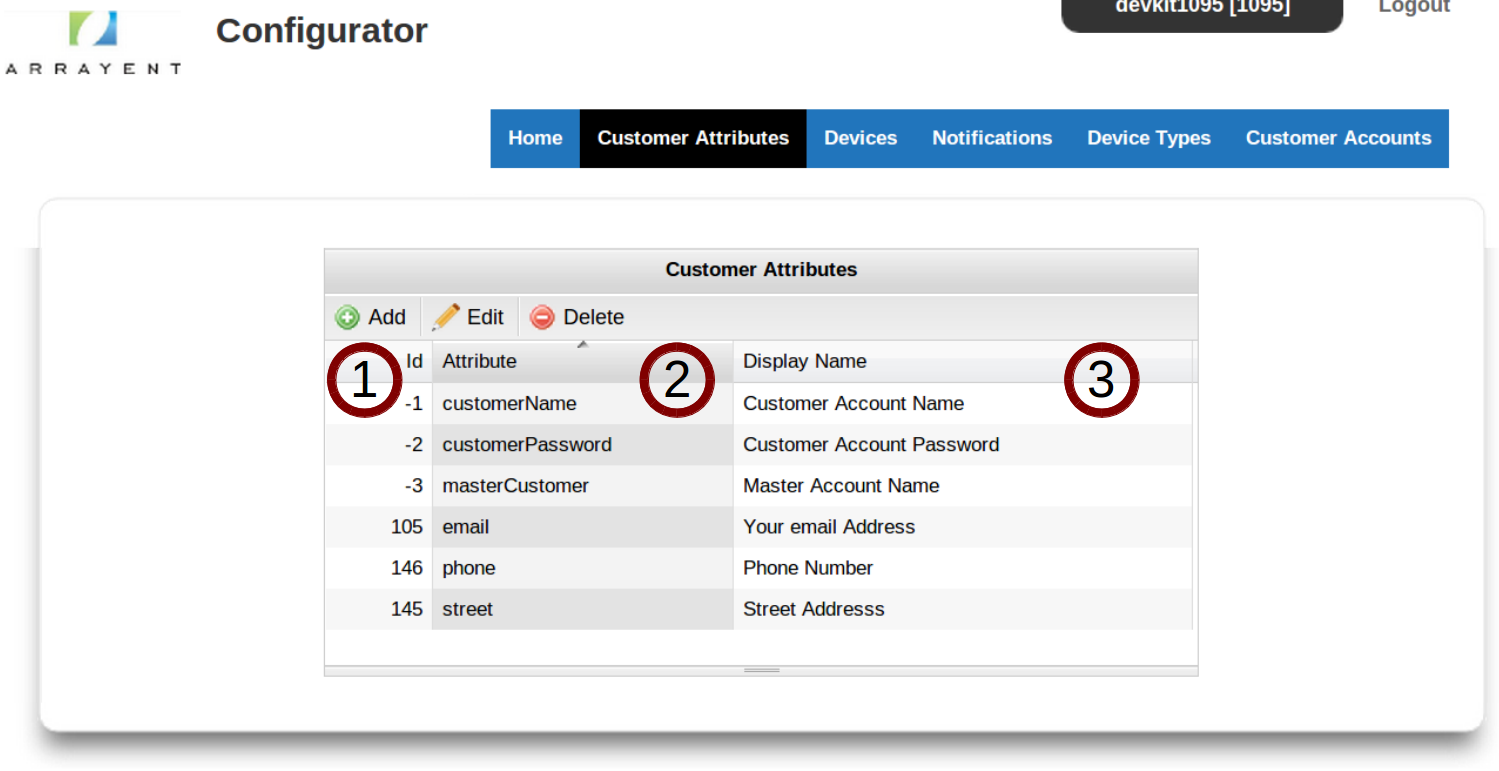
- The leftmost column, Id, is the ID for this customer attribute.
- The next column, Attribute, is the key (as in key-value pair) for this customer attribute. Whenever a web app wants to read or modify the value of this attribute for a particular user, it references the attribute by this key.
- The last column, Display Name is a human friendly description of the attribute.
Adding Customer Attributes
This section explains how to add a new attribute to your Customer Account data model.
- Click the Customer Attributes tab to go to the Customer Attributes page of the Configurator.
To add a new attribute to your Customer Account data model:
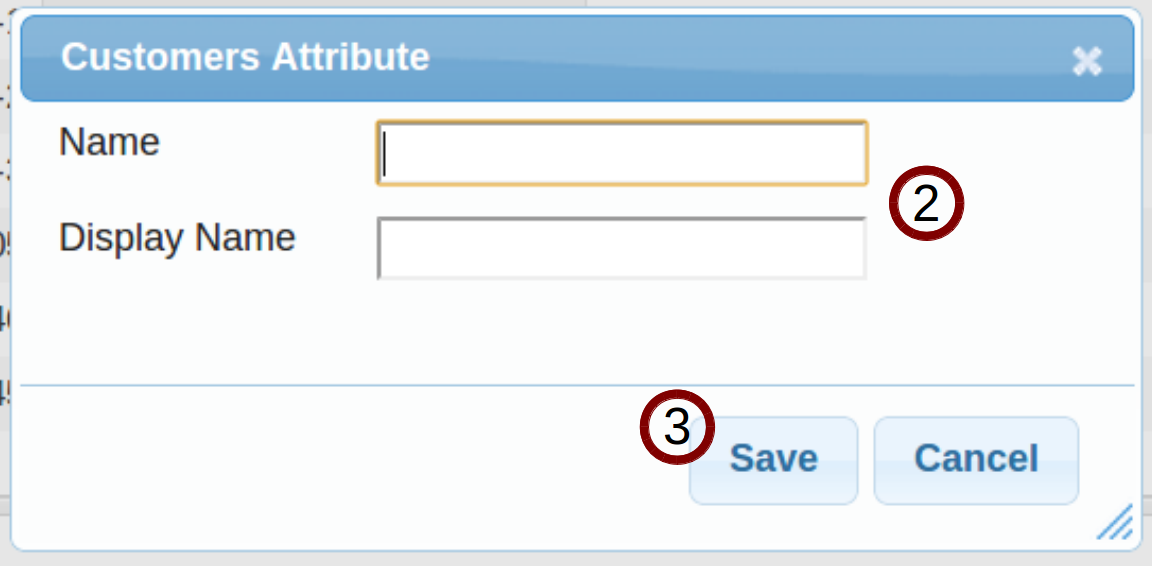
- Click Add.
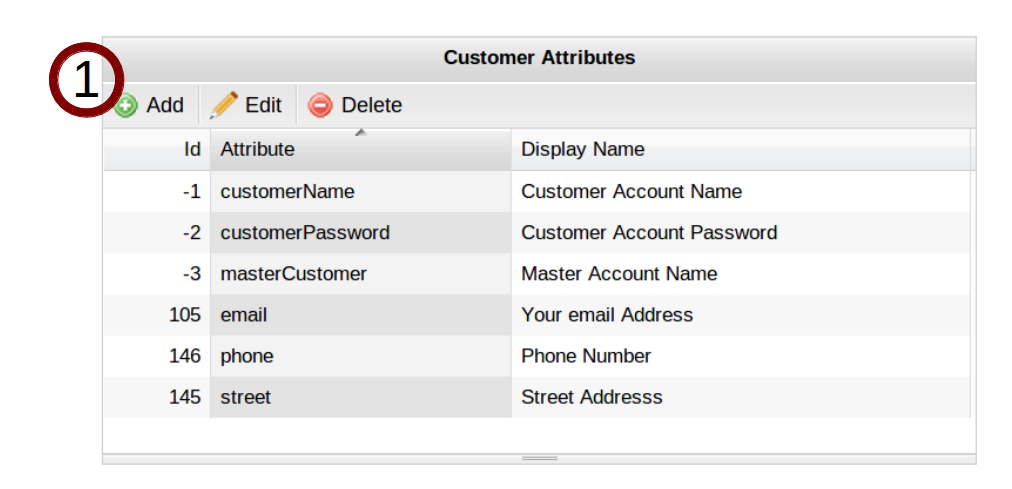
- Enter a name and display name for the attribute. The name is the key (as in key-value pair) for the attribute. The display name is just a human-friendly description of the attribute.
- Click Save.
Modifying Customer Attributes
This section explains how to modify an existing attribute in your Customer Account data model. Customer Account attributes are simple scalar fields, consisting of a key-value pair, and a display name that describes the attribute. The only modifications that you can make to an attribute are editing the key of the attribute, or the display name of the attribute.
- Click the Customer Attributes tab to go to the Customer Attributes page of the Configurator.
To modify the key or display name of an existing customer attribute:
- Click the attribute that you need to modify. This will highlight the attribute.
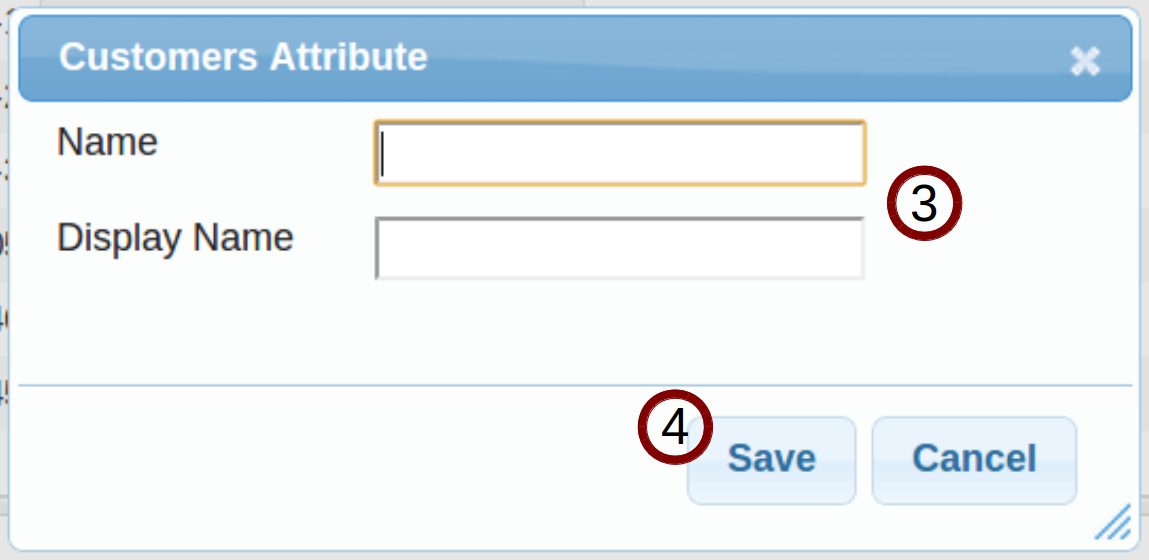
- Click the Edit button.
- Modify the key or display name of the attribute as needed.
- Click Save.
Note
You cannot modify or delete a customer attribute which is already in use.
Deleting Customer Attributes
This section explains how to delete an existing attribute in your Customer Account data model.
- Click the Customer Attributes tab to go to the Customer Attributes page of the Configurator.
To delete an existing customer attribute:
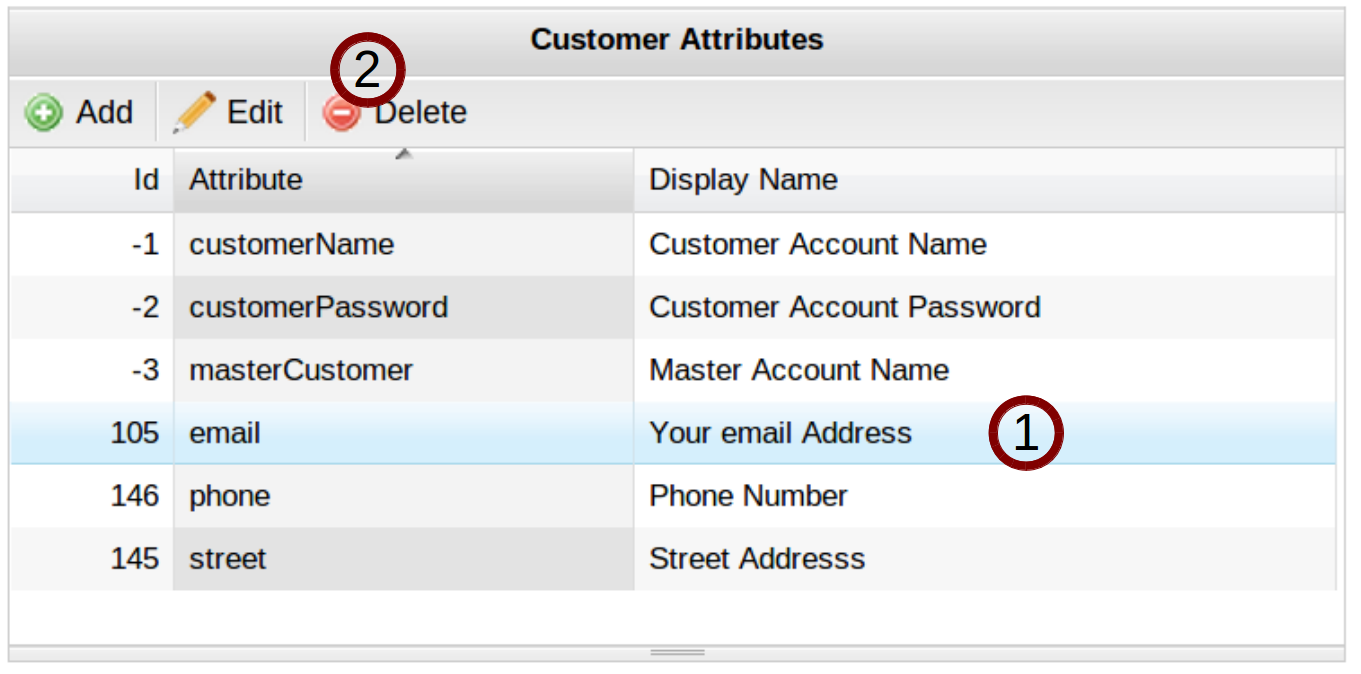
- Click the attribute that you need to delete.
- Click the Delete button.
Note
You cannot modify or delete a customer attribute which is already in use.
Devices Page
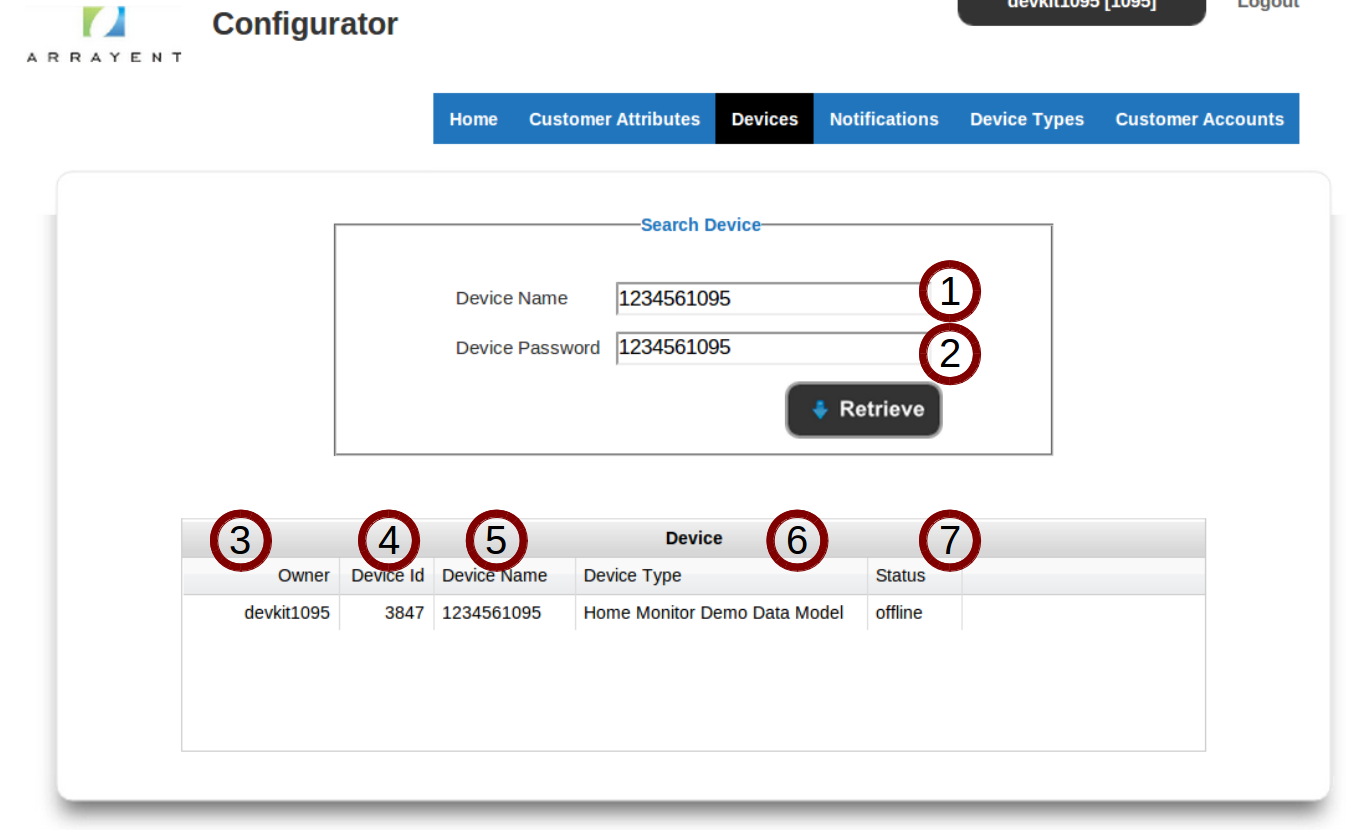
The Devices page of the Configurator enables you to retrieve information about individual devices.
The descriptions and image below summarize the layout of the Devices page of the Configurator.
- The Device Name of the device to retrieve.
- The Device Password of the device to retrieve.
- The Customer Account which owns the device.
- The ID of the device.
- The Device Name of the device. This is the same as the Device Name which you entered above.
- The Device Type which the device is instantiated as.
- The connection status of the device.
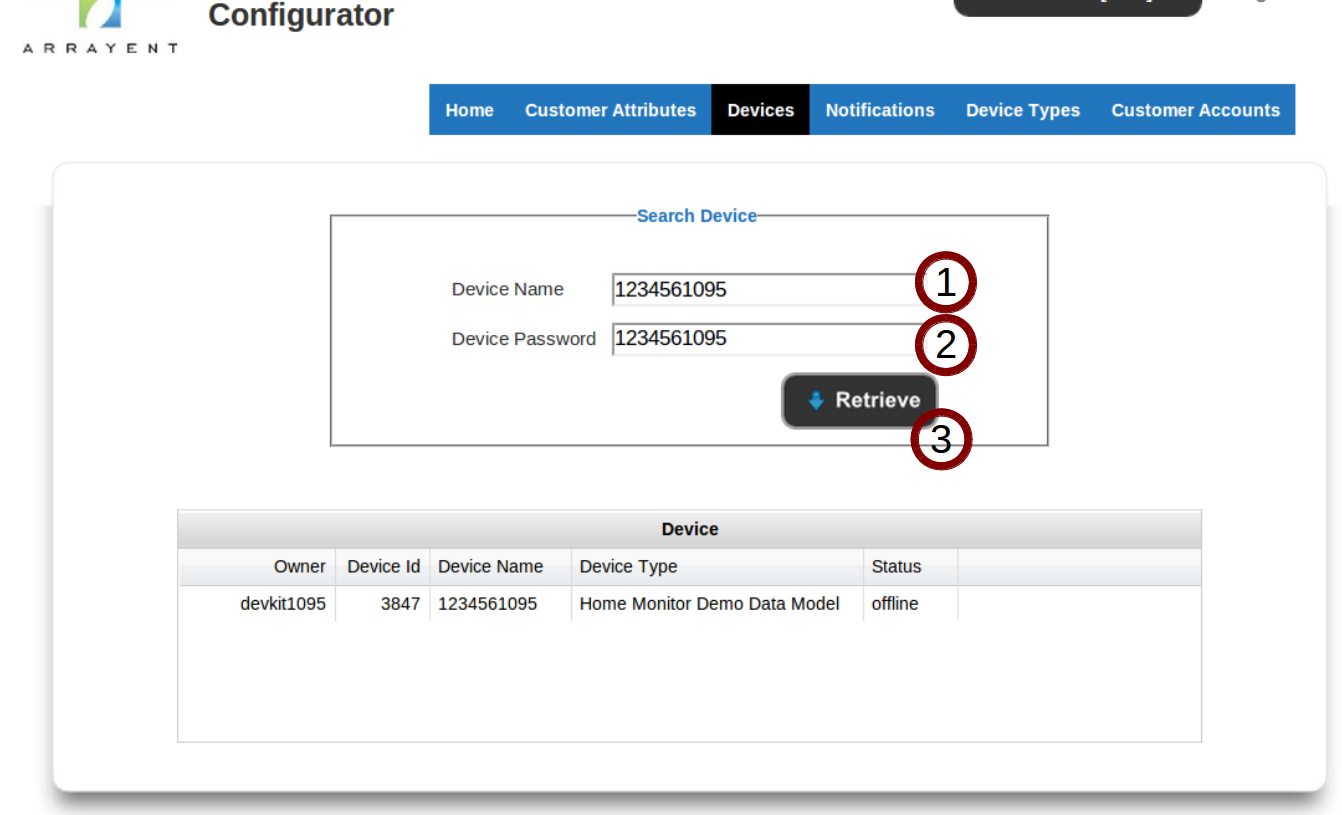
Retrieving Device Information
This section explains how to retrieve information about a device using the Devices page of the Configurator.
- Click the Devices tab to go to the Devices page of the Configurator.
To retrieve information about an individual device:
- Enter the Device Name of the device.
- Enter the Device Password of the device.
- Click Retrieve.
Warning
This feature of the Configurator will not work if the device is owned by a Customer Account that has been created by a different System Account.
Notifications Page
The Notifications page of the Configurator enables you to configure how the Arrayent Cloud executes email and mobile push alerts.
The screenshot and accompanying descriptions summarize the key menus of the Notifications page.
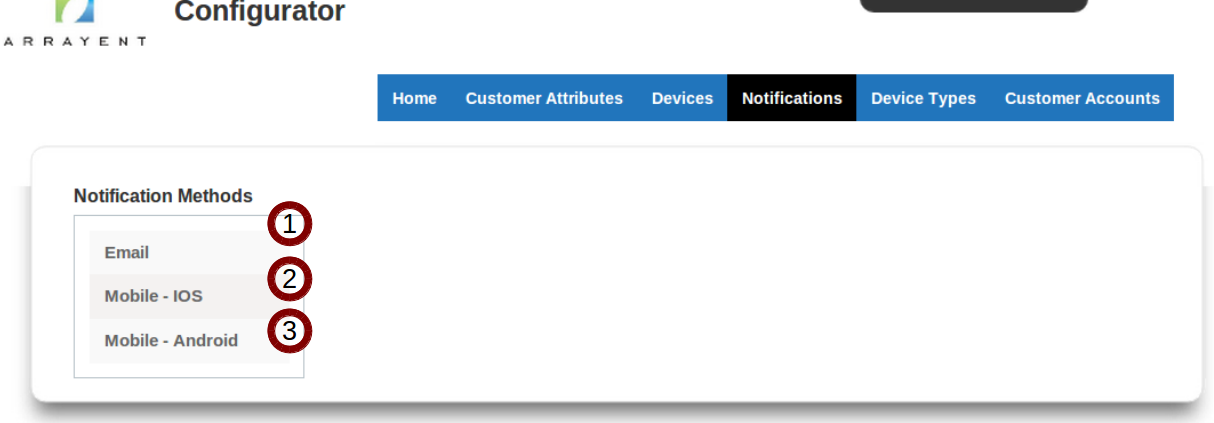
- Clicking the Email menu item enables you to configure how the Arrayent Cloud executes email notifications.
- Clicking the Mobile – IOS menu item enables you to configure how the Arrayent Cloud executes mobile push notifications for iOS devices.
- Clicking the Mobile – Android menu item enables you to configure how the Arrayent Cloud executes mobile push notifications for Android devices.
Configuring Email Notifications
This section explains how to use the Configurator to modify how the cloud executes email alerts.
Note
Email alert configuration is usually done by Arrayent, or in close coordination with Arrayent.
- Click the Notifications tab to go to the Notifications page of the Configurator.
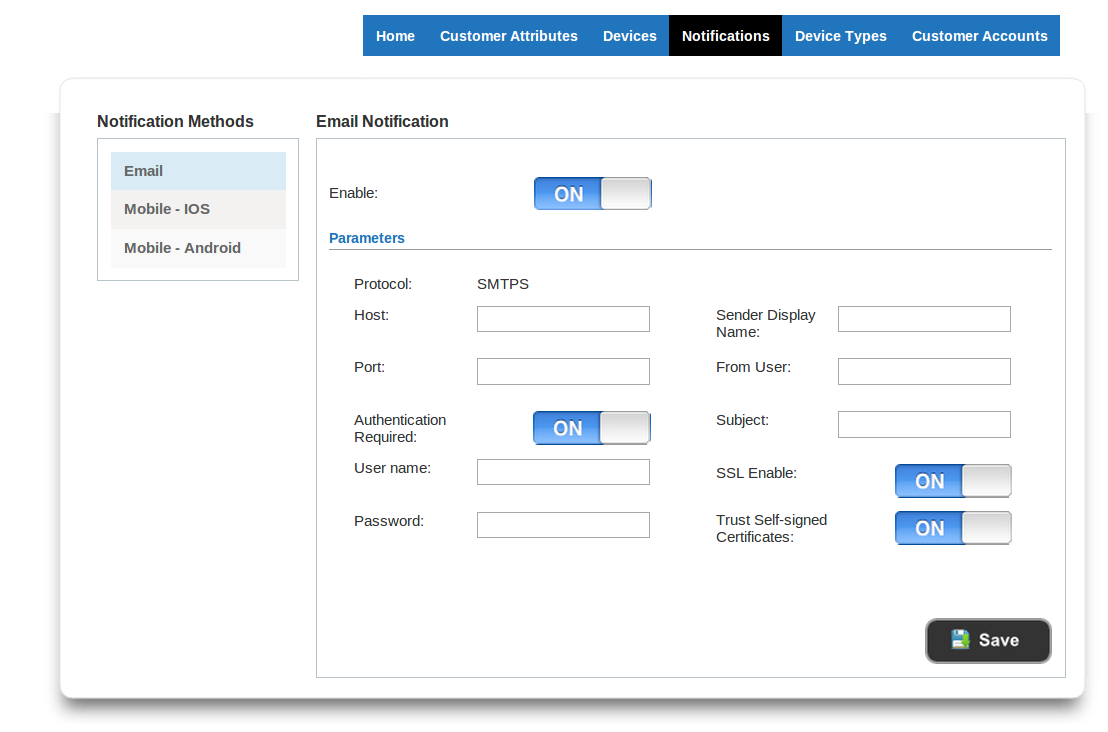
This page is called the Email “view” of the Notifications page of the Configurator. When executing an alert that involves an email notification, the Arrayent Cloud will use the credentials and information that you provide in this view’s form when executing the email. The screenshot and table below summarize the different fields that you must supply when configuring email alerts.
| Field | Description |
|---|---|
| Protocol | Email protocol. Options are SMTPS and SMTP. Setting the SSL Enable button to ON automatically sets the protocol to SMTPS. Setting it to OFF automatically sets the protocol to SMTP. |
| Host | The IP or DNS of the machine that will send the email. |
| Port | The port number which the Arrayent Cloud should use to access the host machine. |
| Authentication Required | Determines whether or not the Arrayent Cloud will need to authenticate on the host machine. |
| Username | The username which the Arrayent Cloud should use when authenticating with the host machine. |
| Password | The accompanying password for the username above. |
| Sender Display Name | When sending emails, this name will show up as the display name of the sender of the email. The implementation of Display Names is determined by the email client of the end user. |
| From User | The email address which the Arrayent Cloud should send the email as. |
| Subject | The subject line of the email. Note that this is the same for all email alerts, so you should make it generic. Suppose your product supports two types of email alerts, one alert that is triggered when a light is turned on, and another that is triggered when a door is opened. If you set the subject line to ‘Door is Open’, the end user will receive an email with this subject line even when the door event alert is triggered. In short, keep your subject lines generic, such as ‘A friendly email notification from ACME Corporation.’ |
| SSL Enable | Specify whether the email is sent via SMTPS or SMTP. |
| Trust self-signed certificates | When using SMTPS, specify whether the email host should trust other email hosts that issue self-signed certificates. Not relevant when using SMTP. |
Uploading Security Certificates for Enabling iOS Push Notifications
This section describes how to use the Configurator to upload an Apple Push Certificates to the Arrayent Cloud so that the cloud can execute iOS push notifications on behalf of your app. Note, to upload multiple certificates you must use theupdateApplicationConfiguration Web API instead of the Configurator.
- Click the Notifications tab to go to the Notifications page of the Configurator.
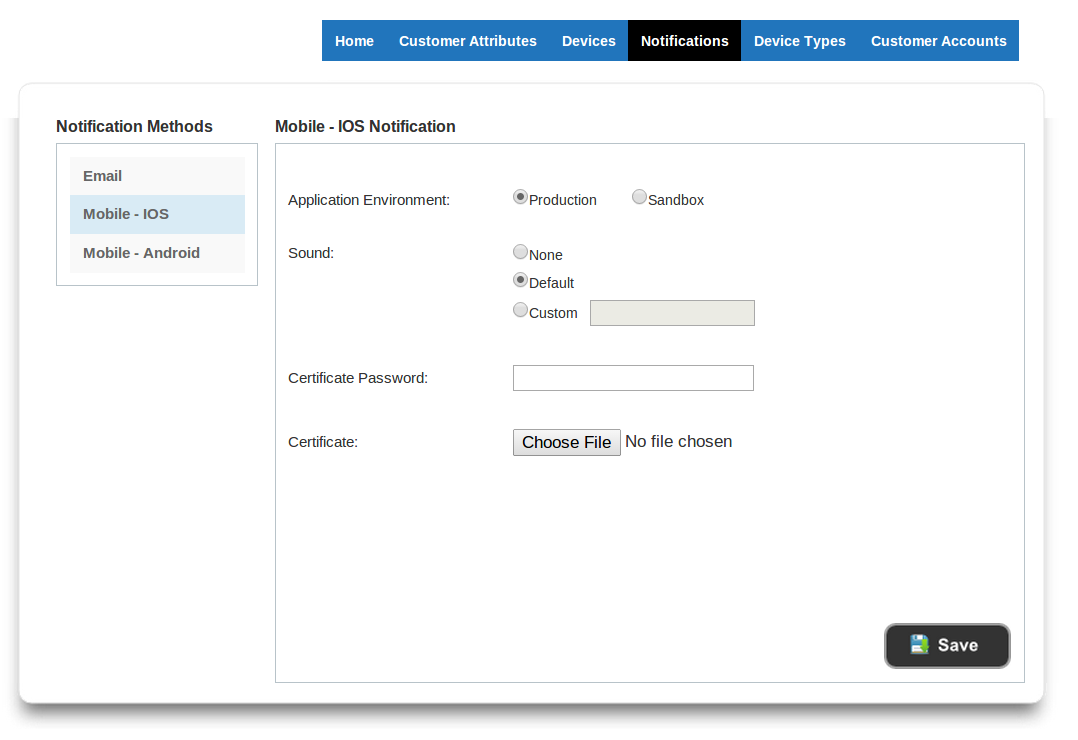
The page shown in the screenshot below is called the iOS “view” of the Notifications page of the Configurator. The iOS view enables you to upload a certificate to the Arrayent Cloud. The Arrayent Cloud will use this certificate when sending push notifications to iOS mobile devices. The screenshot and table below summarize the fields of the iOS view of the Configurator.
| Field | Description |
|---|---|
| Application Environment | The type of certificate that you are providing. Sandbox certificates are used for apps in development. Production certificates are used for production apps that are distributed via the App Store. |
| Sound | The sound which will play on the end user’s iOS device when the alert is received. None specifies that no sound should play.Default instructs the device to use whatever sound the end user has configured as the default notification sound. Custominstructs the device to use the specified sound file. This sound file must exist in your application bundle or else the sound won’t work. |
| Certificate Password | The certificate of the password. This password was created when you generated the certificate. |
| Certificate | The .p12 certificate file. |
Uploading Security Certificates for Enabling Android Push Notifications
This section describes how to use the Configurator to upload security certificates so that the Arrayent Cloud can execute Android push notifications on behalf of your app. Note, to upload multiple certificates you must use the updateApplicationConfiguration Web API instead of the Configurator.
- Click the Notifications tab to go to the Notifications page of the Configurator.
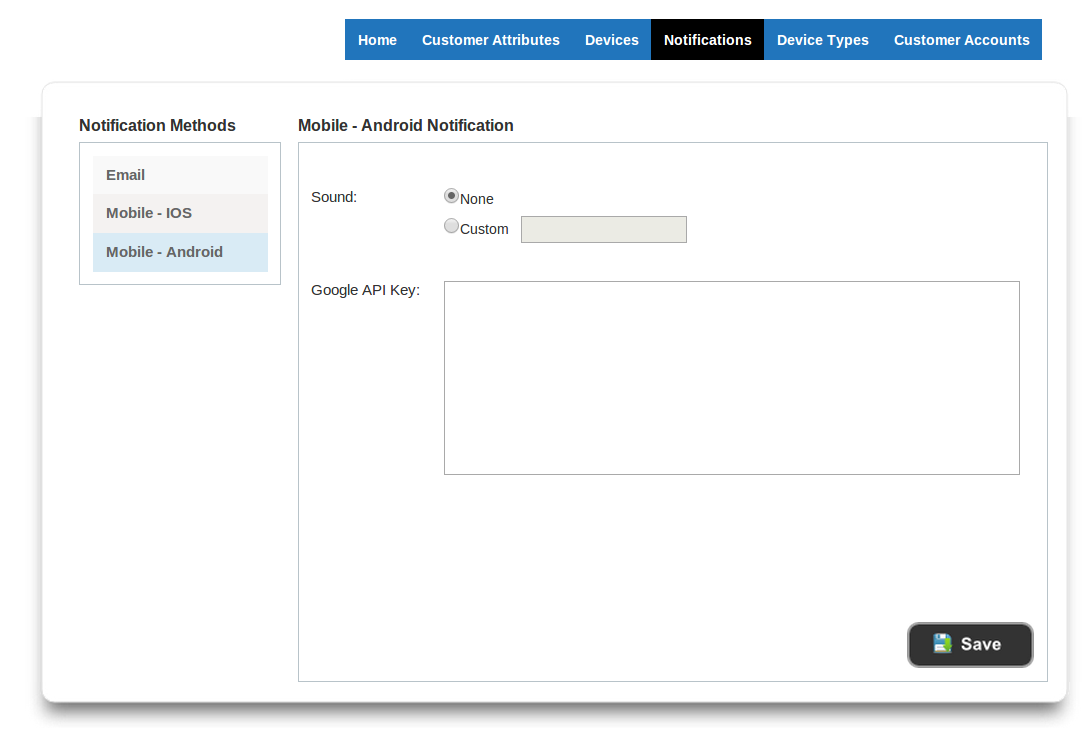
The page shown in the screenshot below is called the Android “view” of the Notifications page of the Configurator. This view enables you to upload a new Google API key to the Arrayent Cloud. The Arrayent Cloud will use this API key when sending push notifications to Android mobile devices. The screenshot and table below summarize the fields of the Android view of the Configurator.
| Field | Description |
|---|---|
| Sound | The name of a sound which will play on the end user’s mobile device when the alert is received. None specifies that no sound should play. Custom specifies that the app should play the sound file located at the path specified in the textbox. The custom sound file must exist in the application bundle or else the sound will not play. |
| Google API Key | The API Key that the Arrayent Cloud will use to authenticate itself with the Google Cloud Messaging Service. |
Device Types Page
The Device Types page of the Configurator enables you to create, view, modify, and delete Device Type definitions.
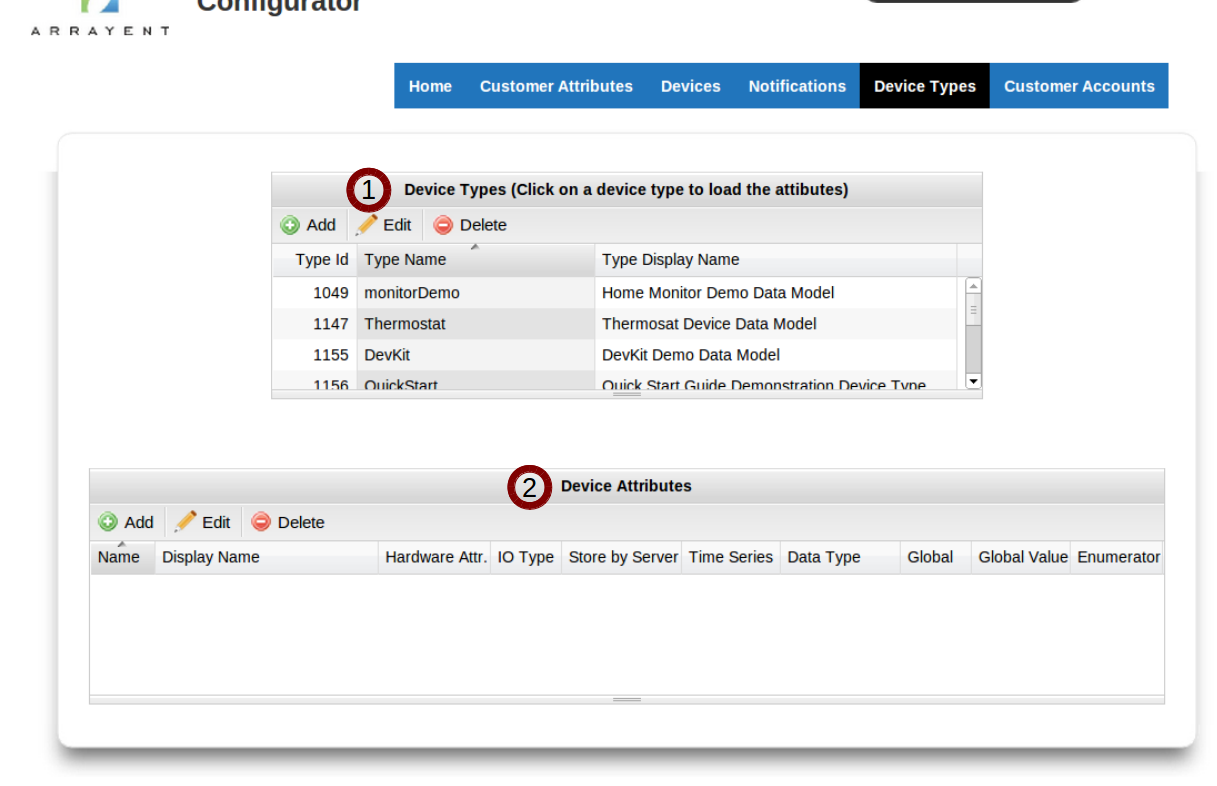
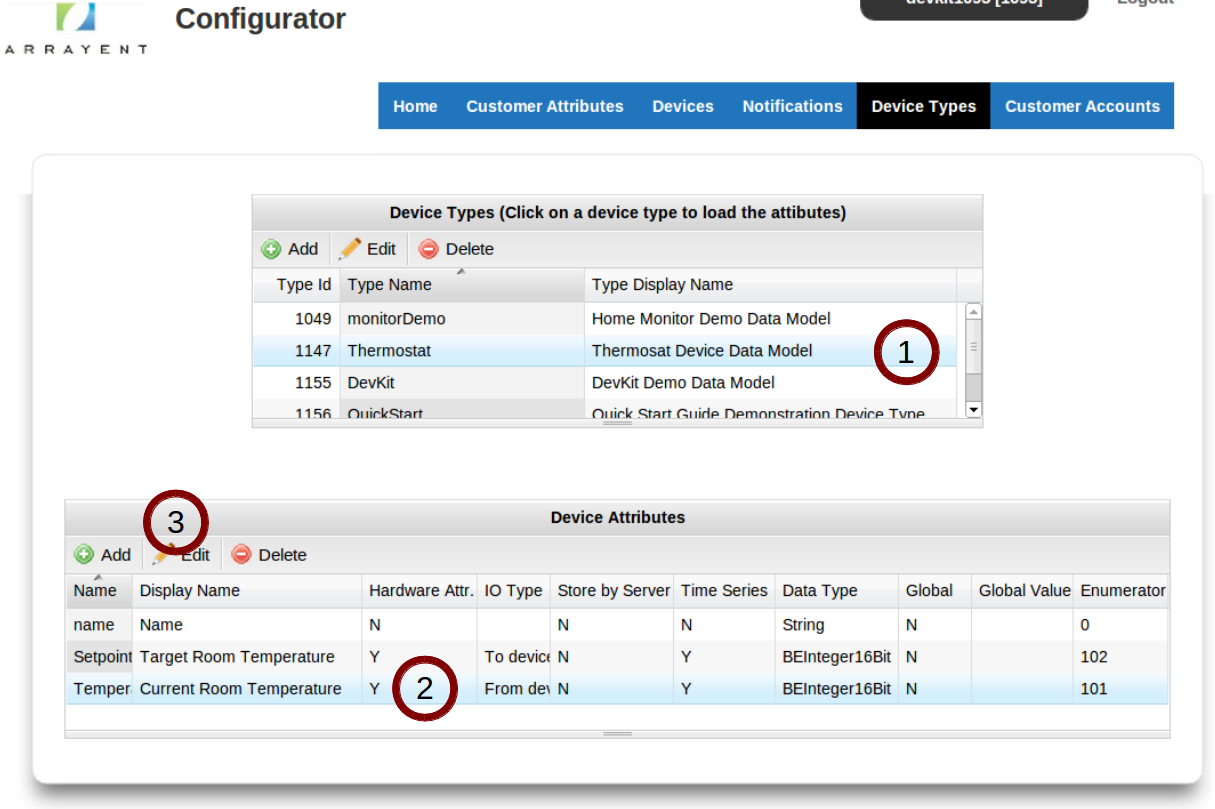
The screenshot and accompanying descriptions below summarize the key interactive items of the Device Types page.
- The Device Types table enables you to create, modify, and delete Device Types. All currently defined Device Types are displayed in the rows of the table. Each Device Type gets one row. Clicking on a Device Type populates the Device Attributes table with all currently defined attributes for the selected Device Type.
- After clicking on a Device Type in the Device Types table, the Device Attributes table will get populated with all of the currently defined attributes for that Device Type. This table enables you to add, modify, and delete Device Attributes.
Creating Device Types
This section describes how to create a new Device Type.
- Click the Device Types tab to go to the Device Types page of the Configurator.

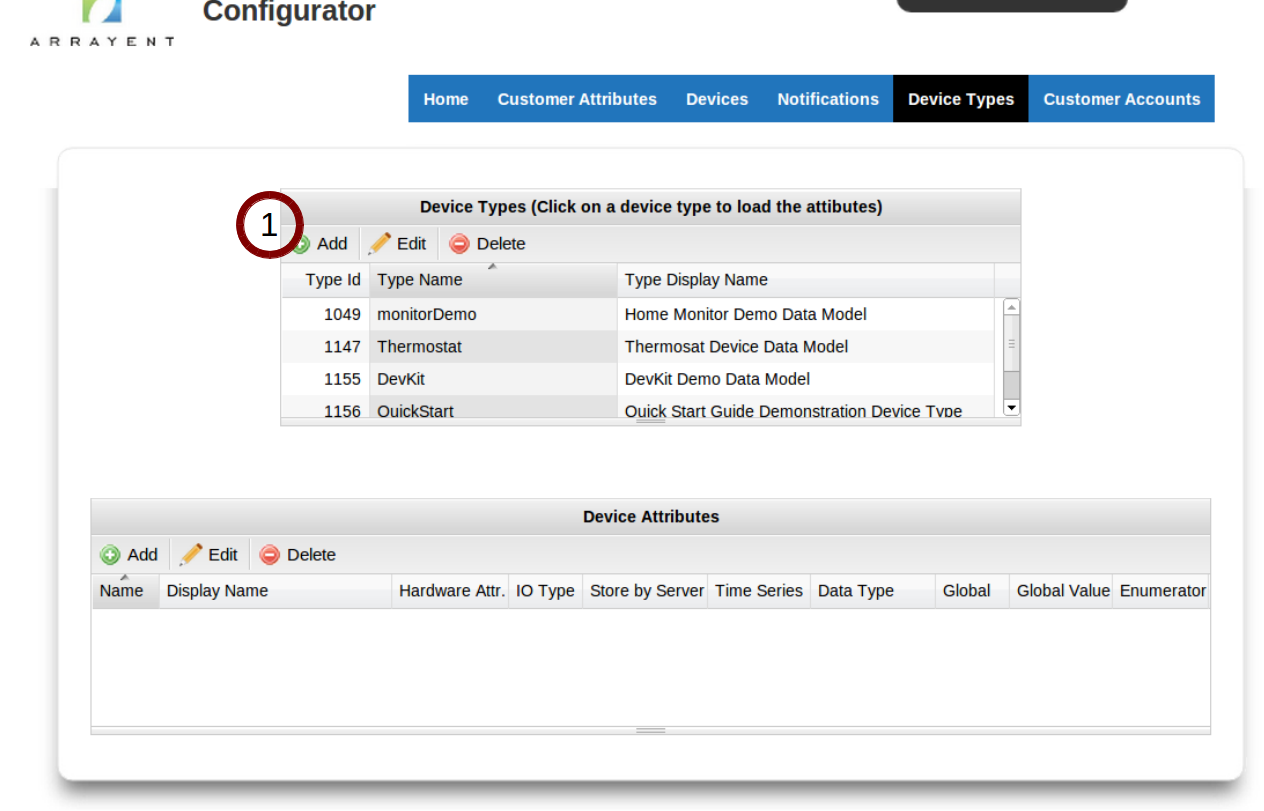
To create a new Device Type:
- Click the Add button.
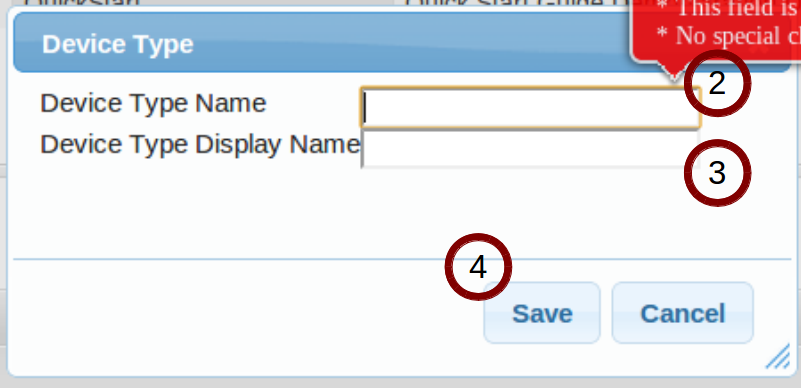
- Enter the name of the Device Type.
- Enter the display name of the Device Type. This is just a description of the Device Type.
- Click the Save button.
Creating Device Attributes
This section describes how to create a new Device Attribute.
- Click the Device Types tab to go to the Device Types page of the Configurator.
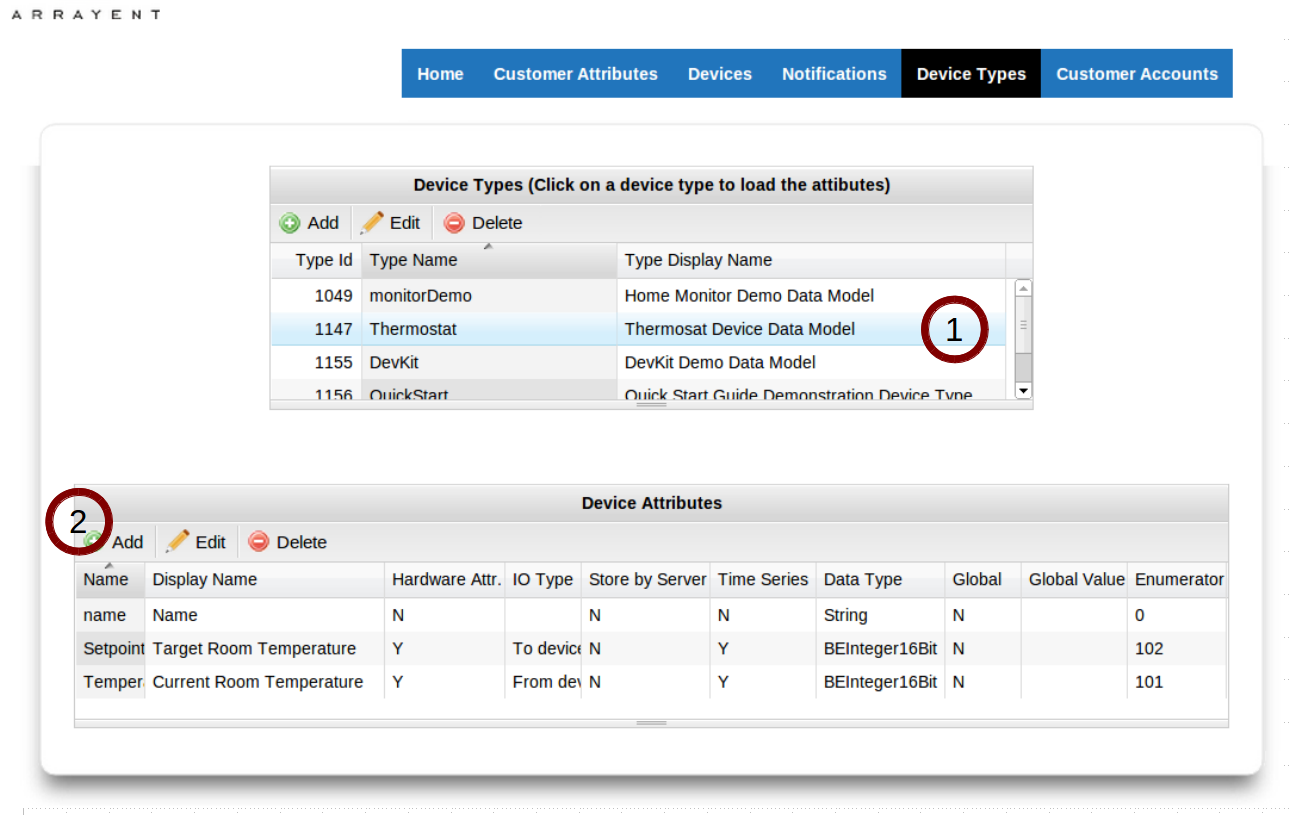
To create a new Device Attribute:
- In the Device Types table click on the Device Type which will contain the new Device Attribute.
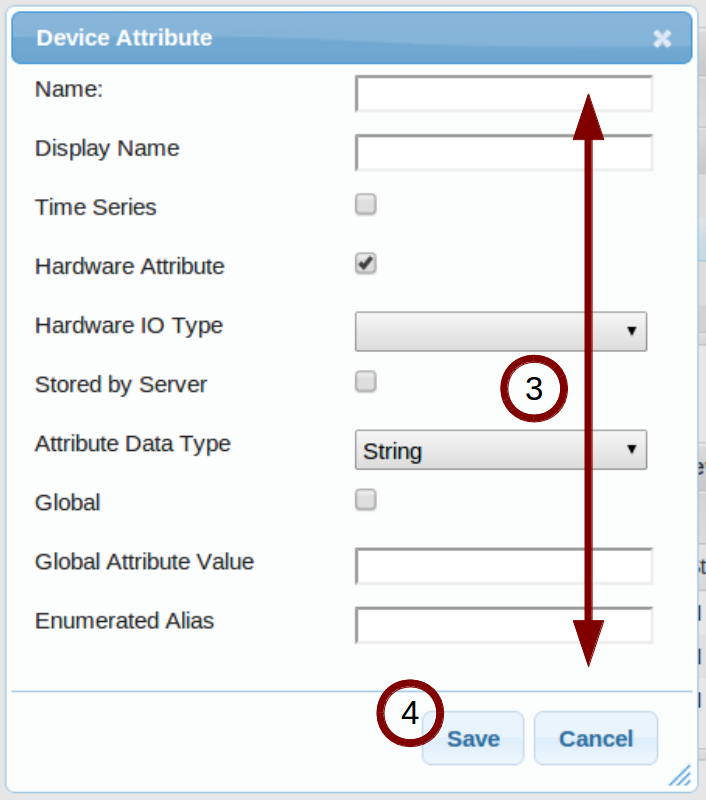
- In the Device Attributes table click the Add button.
- Define the attribute using the provided fields.
- Click the Save button when finished.
Data Types Reference
See Data Types Reference.
Modifying Device Attributes
This section explains how to modify an existing attribute of a Device Type.
- Click the Device Types tab to go to the Device Types page of the Configurator.
To modify an existing Device Attribute:
- In the Device Types table click on the Device Type which contains the Device Attribute.
- In the Device Attributes table click on the attribute you wish to modify.
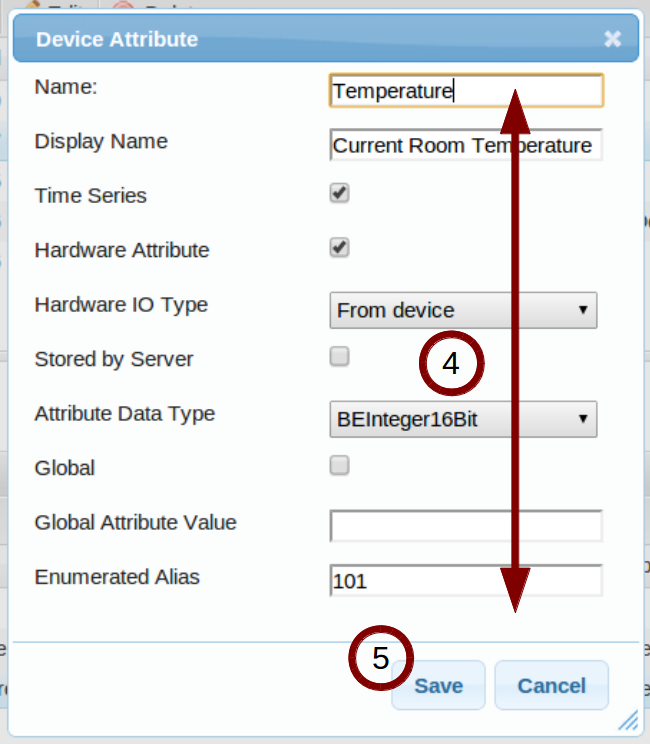
- In the Device Attributes table click on the Edit button.
- Define the attribute using the provided fields.
- Click the Save button when finished.
Deleting Device Attributes
This section describes how to delete a Device Attribute of a Device Type.
- Click the Device Types tab to go to the Device Types page of the Configurator.
To delete a Device Attribute:
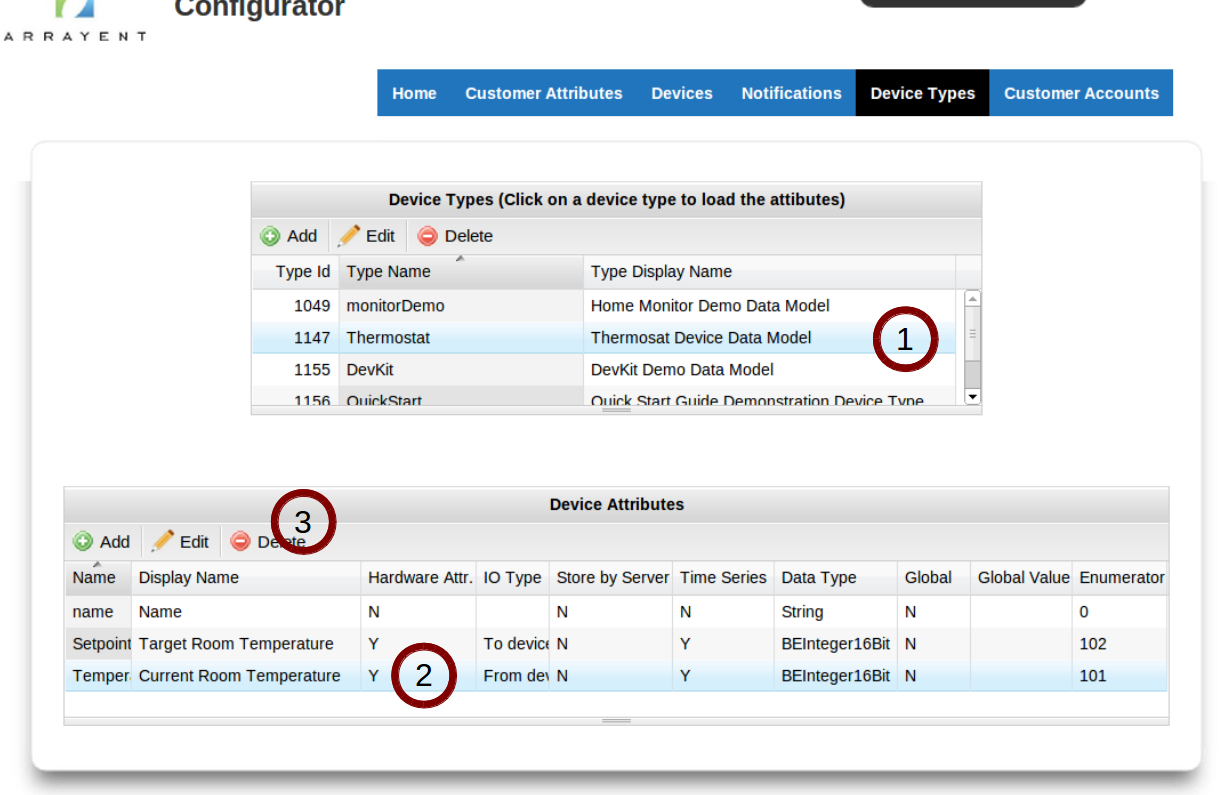
- Click the Device Type which contains the Device Attribute.
- Click the Device Attribute which you wish to delete.
- Click the Delete button.
Customer Accounts Page
The Customer Accounts page of the Configurator enables you to create, view, modify, and delete individual Customer Accounts.
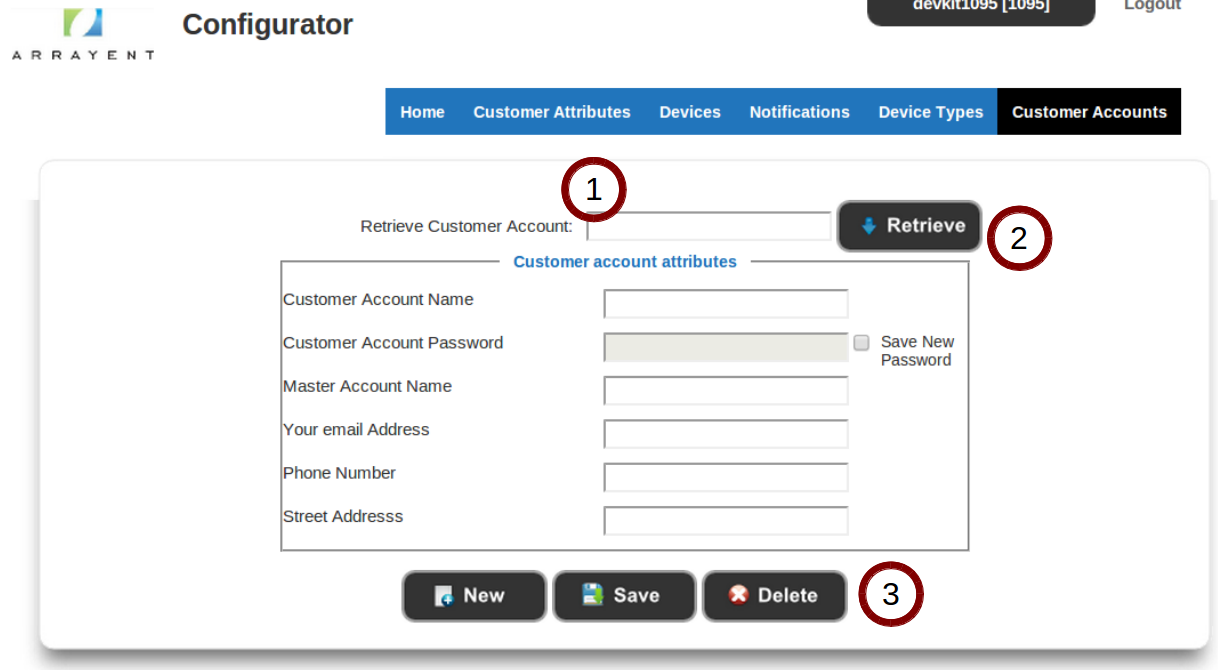
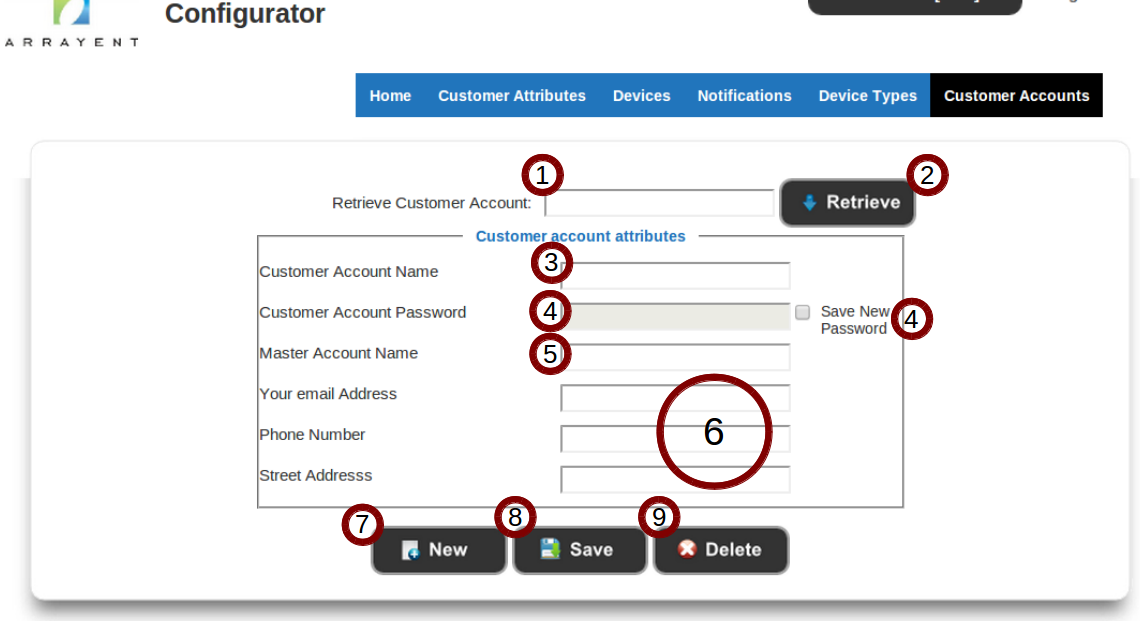
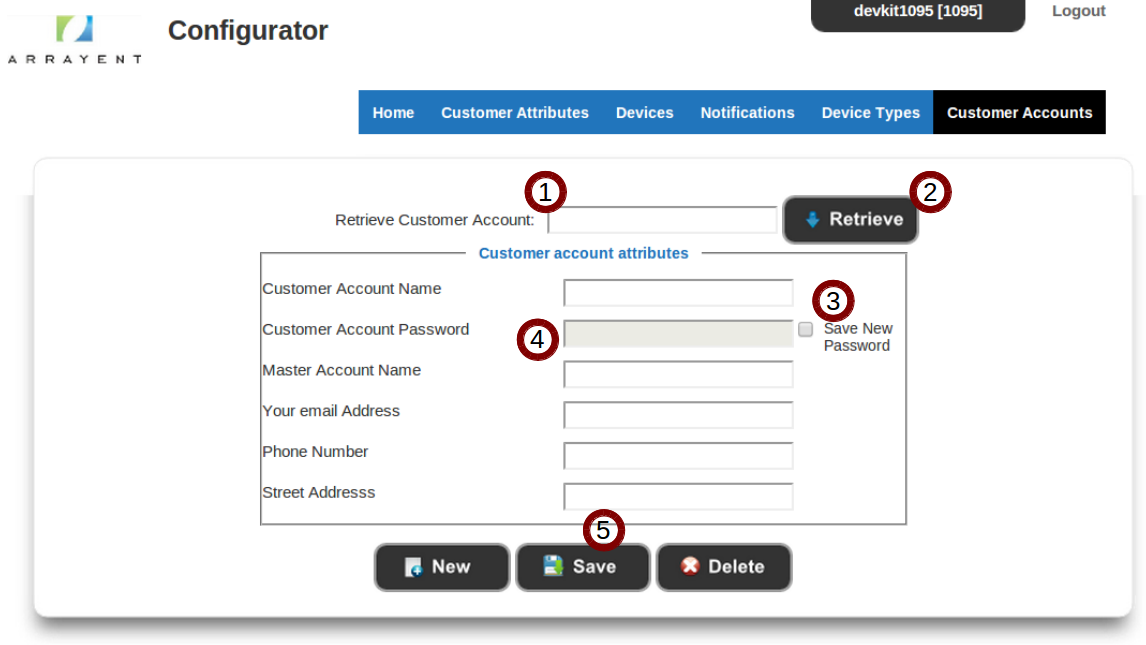
The descriptions and image below summarize the layout of the Customer Accounts page of the Configurator.
- The username of the Customer Account which you want to retrieve or delete. Not relevant when creating a new Customer Account.
- Instructs the Configurator to retrieve the information associated with the Customer Account that was entered in Retrieve Customer Account.
- The username of the Customer Account.
- The password of the Customer Account. The password cannot be viewed, but it can be reset.
- The Master Account which the Customer Account is registered under.
- The current value of any other attributes which you have defined in your Customer Account data model. If the attributes have not been set, these fields will remain blank.
- Clears all currently displayed/entered information. A better label for this button might be “Clear”.
- Saves any changes that you have made to the Customer Account.
- Deletes the Customer Account.
Creating Customer Accounts
This section explains how to create a new Customer Account using the Configurator. The Create Customer Account feature of the Configurator is accessed via the Customer Accounts page. To access that page:
- Click the Customer Account tab to go to the Customer Account Page of the Configurator.
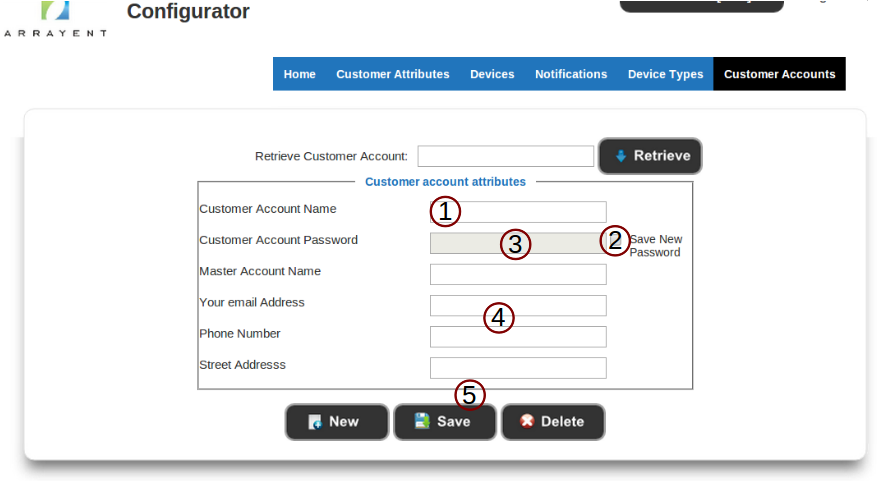
Once at the Customer Accounts page, complete the following procedure to create the new Customer Account:
- Enter the username of the new account in the text field next to Customer Account Name.
- Select the checkbox. This will enable you to enter text in the textbox next to Customer Account Password.
- Enter the password of the new account.
- Enter values for the other user attributes as needed. All attributes other than username and password are optional.
- Click Save.
Viewing and Modifying Customer Accounts
This section explains how to view or modify an individual Customer Account.
- Click the Customer Account tab to go to the Customer Account Page of the Configurator.
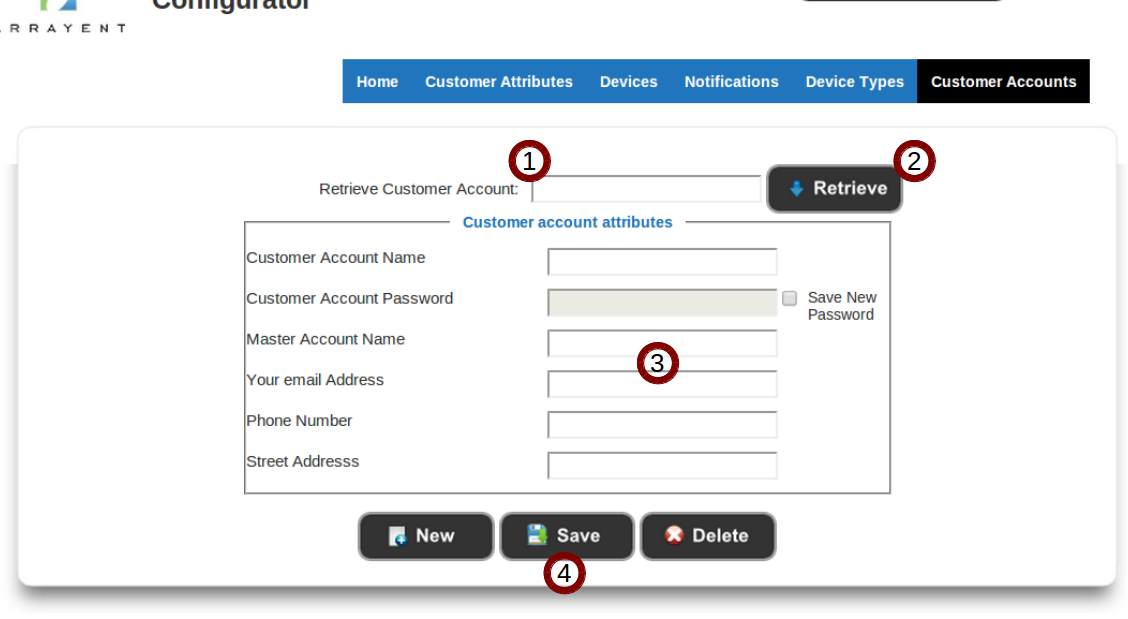
To view or modify a Customer Account:
- Enter the username of the Customer Account in the Retrieve Customer Account: textbox.
- Click the Retrieve button.
- View or modify the Customer Account’s information as needed.
- If modifying the Customer Account, press the Save button when finished.
Resetting Customer Account Passwords
This section explains how to reset a Customer Account password.
- Click the Customer Account tab to go to the Customer Account Page of the Configurator.
You cannot view the passwords of Customer Accounts, but you can reset them. To reset a Customer Account’s password:
- Enter the username of the Customer Account.
- Click the Retrieve button.
- Click the checkbox next to Save New Password.
- Enter the new password in the textbox.
- Click the Save button.
Deleting Customer Accounts
This section explains how to delete a Customer Account from the Arrayent Cloud.
- Click the Customer Account tab to go to the Customer Account Page of the Configurator.
To delete a Customer Account:
- Enter the username of the Customer Account that you wish to delete.
- Click the Retrieve button.
- Click the Delete button.