Quick Start Guide Marvell WMSDK DevKit
Introduction
In this guide you learn how to use the Arrayent Connect Platform to remotely monitor and control your Marvell WMSDK evaluation board over the Internet.
Supported Hardware and Software
The following hardware and software is supported:
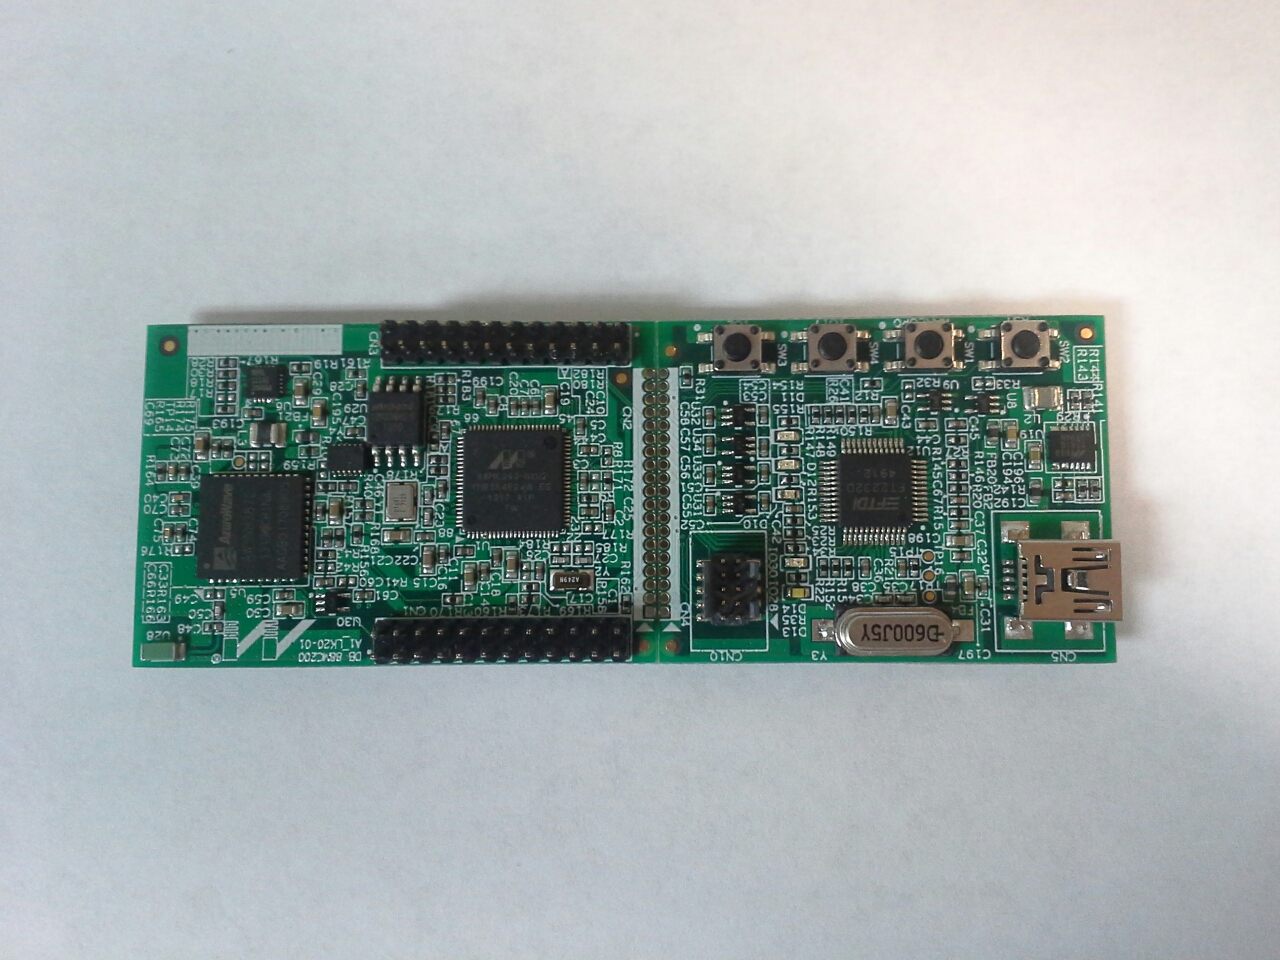
- Evaluation Board: LK20-v3
- SDK: Marvell WMSDK 2.13 or higher
The sample application and/or Arrayent library may work with other versions of evaluation board, module, or SDK. But Arrayent cannot guarantee or verify this. Arrayent only supports the combination of hardware and software just mentioned above.
Getting an Evaluation Board
The LK20-v3 evaluation board is available for purchase from the following vendors:
Marvell has a new 88MC200 development board which should also be compatible with this DevKit, although we have not verified this:
Setting Up the Application
In this section you learn how to build and download the Arrayent sample application onto your evaluation board. You will need a command-line interface (CLI) to complete this section. We assume that your CLI supports UNIX-style commands (cd, ls, etc.), or that you know the equivalent commands for your operating system.
- Open the email that Arrayent sent you containing your DevKit credentials.
- Inside of the email there is a link to download software. Click the link to download the software.
- The file that you download will be compressed in Zip format. Extract the file. After extraction you will get a directory called
marvell-wmsdk-DevKit-YYYYMMDD. - Open the Marvell WMSDK User Guide (wmsdk-user-guide.pdf).
- Complete Chapter 3 “Quick Start Guide” of the Marvell WMSDK User Guide.
- Connect to your evaluation board using a serial terminal like PuTTY. This is explained in Chapter 3 “Quick Start Guide” of the Marvell WMSDK User Guide. The screenshot below provides an example of how to setup PuTTY. The COM port should match whatever port your evaluation board is currently connected to.

- Open a command line interface and change directories to the following directory:
cd/path/to/marvell-wmsdk-DevKit-YYYYMMDD/wmsdk_bundle-x.x.x.x/bin/wmsdk-x.x.x.x/tools/mc200/OpenOCD
You need to replace
/path/toandYYYYMMDDandx.x.x.xto match the files you received.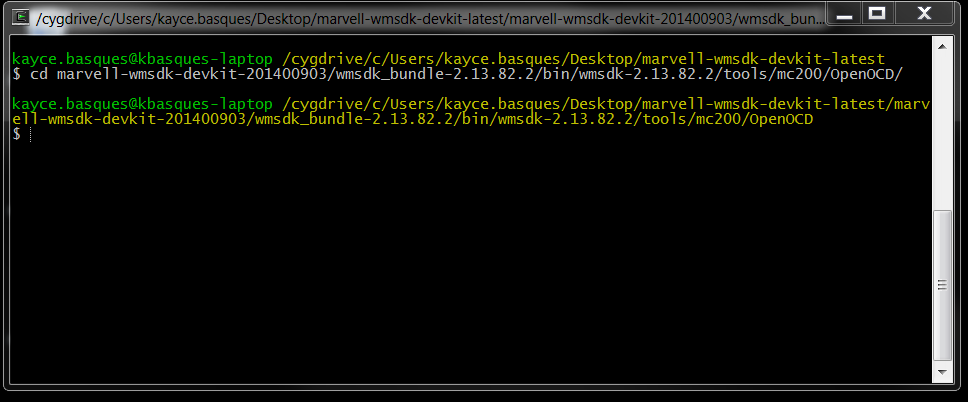
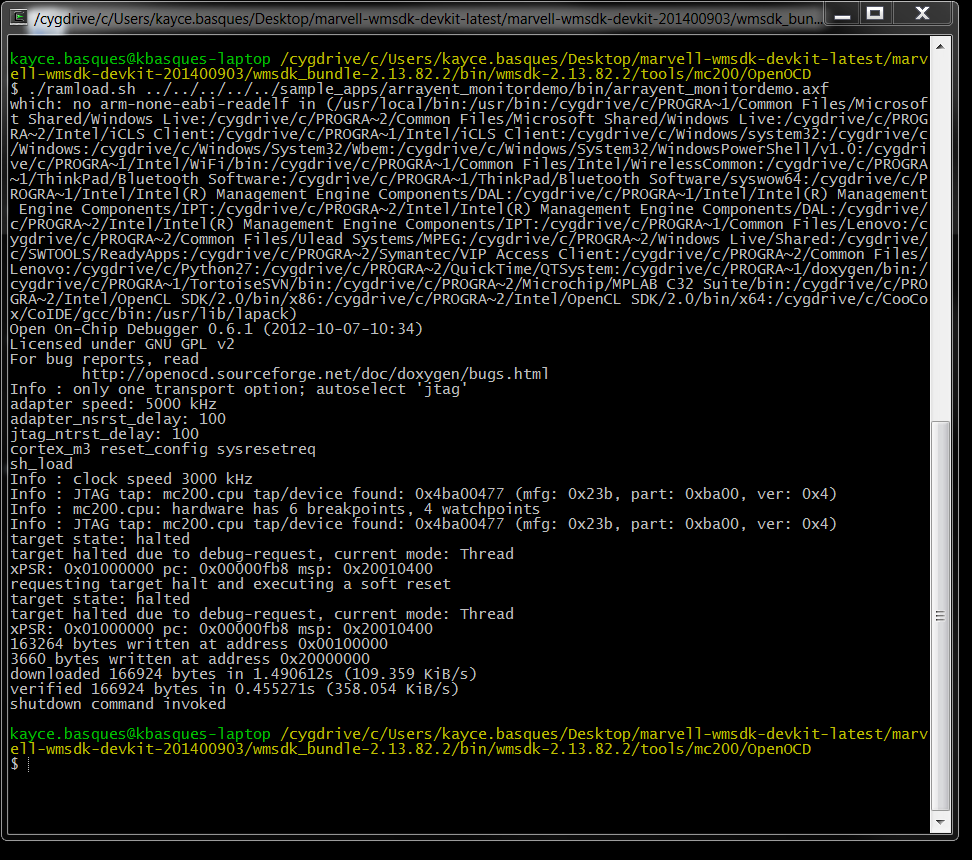
- Execute the following command:
./ramload.sh ../../../../../sample_apps/arrayent_monitordemo/bin/arrayent_monitordemo.axf
You may need to execute the script with superuser privileges. E.g.
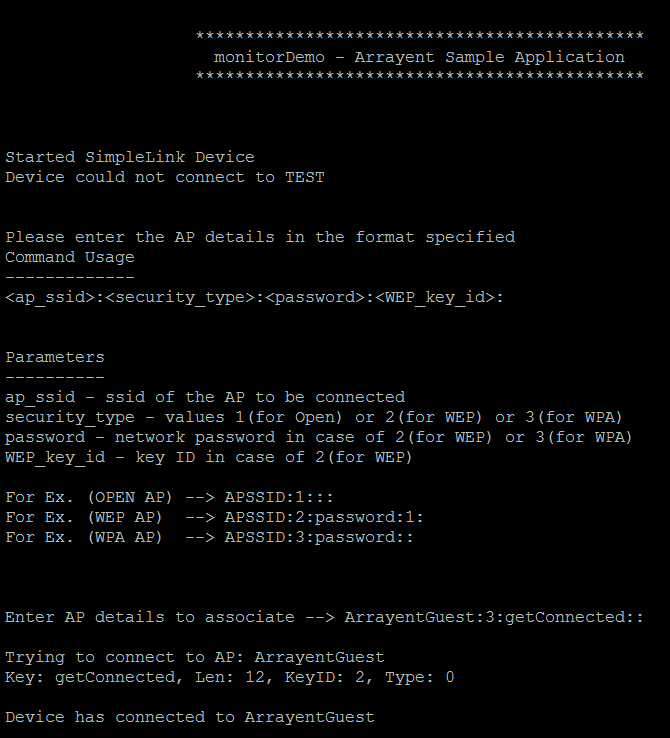
sudo./ramload.sh...If you get./ramload.sh:commandnotfoundyou need to enable executable permissions on the file. E.g.chmod700ramload.shIf you get./ramload.sh:line79:./bin/linux/openocd:Permissiondeniedyou need to enable executable permissions on that file as well. E.g.chmod700bin/linux/openocdIf you get./bin/linux/openocd:errorwhileloadingsharedlibraries:libftdi.so.1:cannotopensharedobjectfile:Nosuchfileordirectoryyou need to install libftdi. E.g.sudoapt-getinstalllibftdi-dev(if you’re working on Ubuntu) - You should see the following output on your serial terminal.
Configuring the Sample Application
In this section you use a serial terminal to pass configuration information to the sample application.
Configuring Arrayent
In your DevKit credentials email you received various device credentials. Now you need to pass these credentials to the sample application. The sample application will attempt to connect to the Arrayent Cloud using these device credentials.
- In the last section you used a serial terminal like PuTTY to connect to your development board. That terminal should still be open. If not, open it now.
- Enter the SSID and passphrase to your Wi-Fi Access Point.
- Open your DevKit credentials email.
- For every configuration attribute which the sample application prompts you for, input the value for that attribute that is listed in your DevKit credentials email.
Once you supply all of the credentials the application will automatically attempt to connect to the Arrayent Cloud.
Configuring the Arrayent Cloud
In this section you use the Arrayent Configurator web application to create a device data model in the Arrayent Cloud. Then you create a Customer Account in the Arrayent Cloud, which you will use later on to monitor and control your device.
Logging In to the Configurator
Follow the instructions below to learn how to log in to the Arrayent Configurator web application.
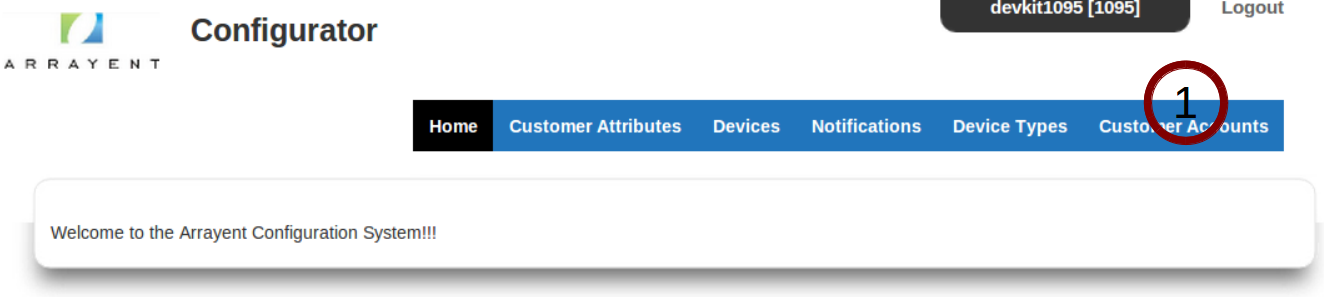
- Open a web browser and go to the Configurator.The URL to the Configurator on our shared DevKit cloud environment is https://DevKit-api.arrayent.com:8081/Configurator. Go to this URL unless Arrayent has instructed you otherwise.
- Enter your System Account credentials into the login form.

- Click Login.
Creating a Device Data Model
In this section you learn how to create a device data model using the Arrayent Configurator web application. In Arrayent terminology a device data model is referred to as a “Device Type”.
Creating the “monitorDemo” Device Type
In this section you learn how to create a device data model using the Arrayent Configuration web application. In Arrayent terminology we call the device data model a “Device Type”. The name of the Device Type we are creating will be called “monitorDemo”.
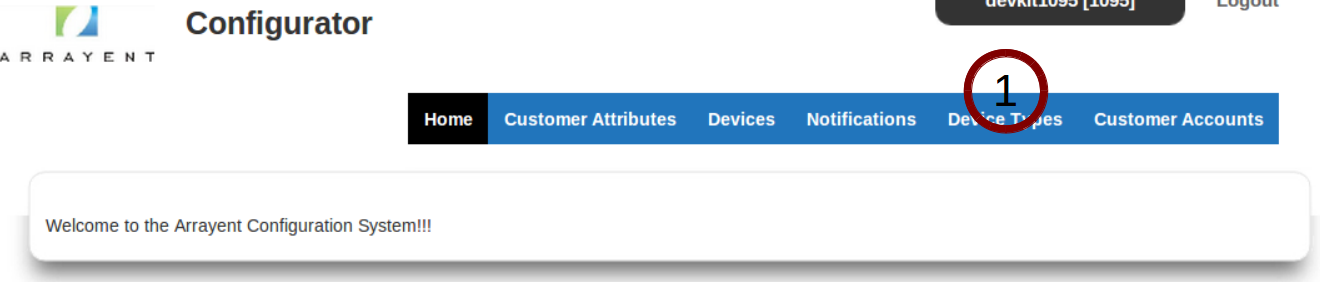
- Click the Device Types tab to go to the Device Types page of the Configurator.
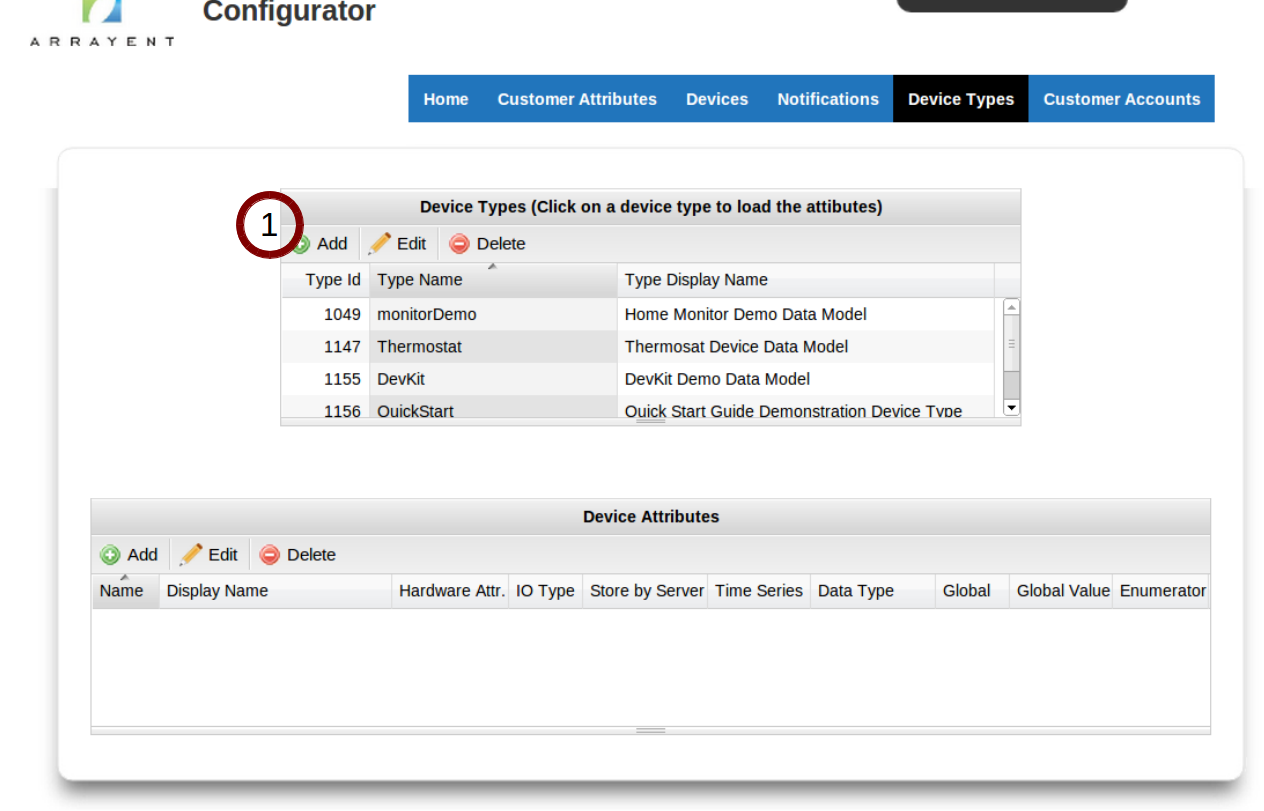
This page enables you to create, modify, and delete device data models.
- Click Add.
- For Device Type Name enter monitorDemo.
- For Device Type Display Name enter monitorDemo.
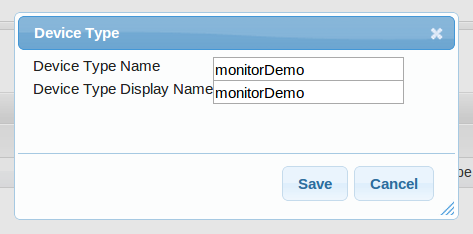
- Click Save.
Creating the “led1” Device Attribute
In this section you use the Configurator to define a device attribute called “led1”. Later on you will use this attribute to control the LED on your evaluation board.
- On the “Device Types” page of the Configurator you see two tables. The top table is titled “Device Types”. Click on the row containing our new Device Type, “monitorDemo”. This should highlight the row in blue.
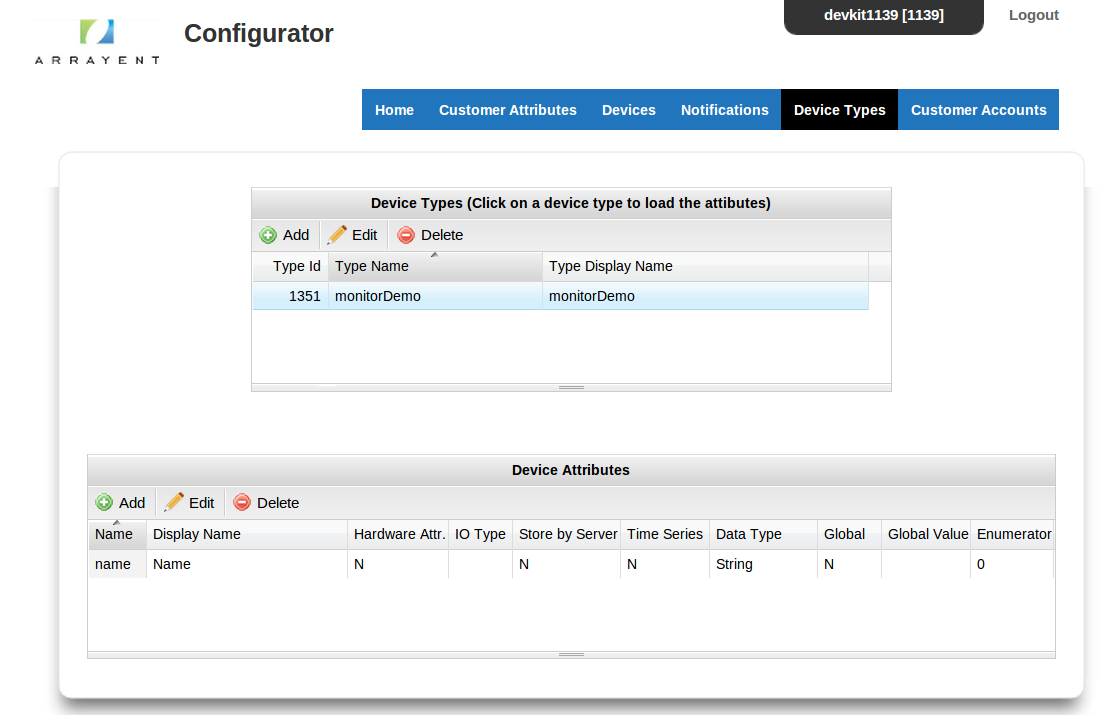
- In the bottom table titled “Device Attributes” click the Add button.
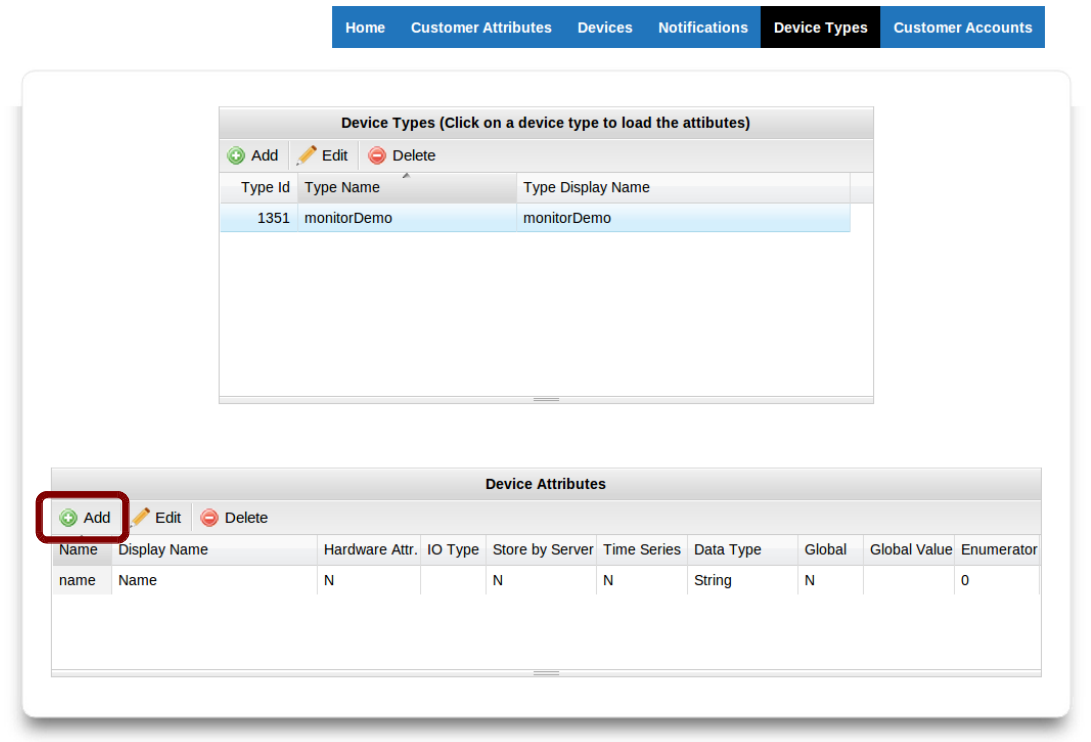
- Fill out the form so that your new Device Attribute matches the image below. Click Save when finished.
Creating a Customer Account for Monitor and Control
Follow the instructions in the next section to learn how to use the Configurator to create a new Customer Account in the Arrayent Cloud. Later on you will login to the Arrayent Cloud as this Customer Account and then monitor and control your evaluation board via the Arrayent Utility web application.
Creating Customer Accounts
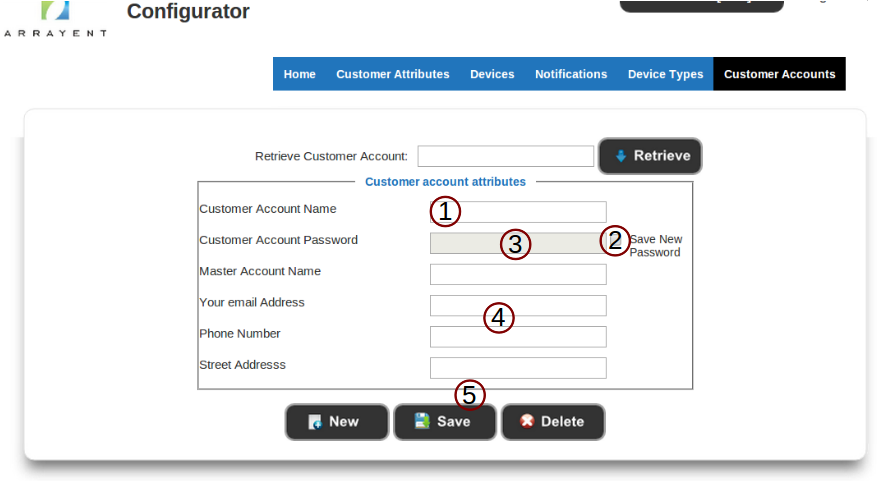
This section explains how to create a new Customer Account using the Configurator. The Create Customer Account feature of the Configurator is accessed via the Customer Accounts page. To access that page:
- Click the Customer Account tab to go to the Customer Account Page of the Configurator.
Once at the Customer Accounts page, complete the following procedure to create the new Customer Account:
- Enter the username of the new account in the text field next to Customer Account Name.
- Select the checkbox. This will enable you to enter text in the textbox next to Customer Account Password.
- Enter the password of the new account.
- Enter values for the other user attributes as needed. All attributes other than username and password are optional.
- Click Save.
Monitoring and Controlling the Evaluation Board
In this section you use the Arrayent Utility web application to monitor and control your evaluation board.
Logging In to the Utility Application
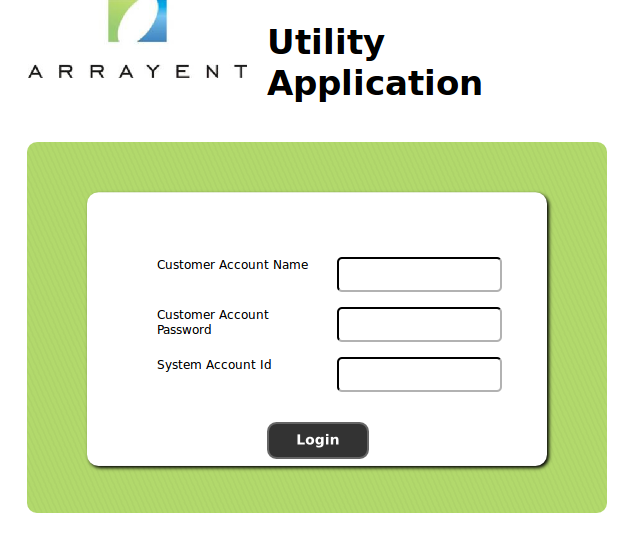
Follow the instructions below to learn how to log in to the Arrayent Utility web application.
- Open a web browser and go to the URL of the Utility application.The URL to the Utility application hosted on our shared DevKit cloud environment is https://DevKit-api.arrayent.com:8081/Utility. Go to this URL unless Arrayent has instructed you otherwise.
- Log in with the Customer Account credentials that you created earlier with the Configurator.
Adding the Device to Your Account
In the Arrayent Cloud, a device (in this case, your evaluation board) must be owned by a Customer Account before it can be monitored and controlled.
- Click the Devices tab to go to the Devices Page of the Utility Tool.
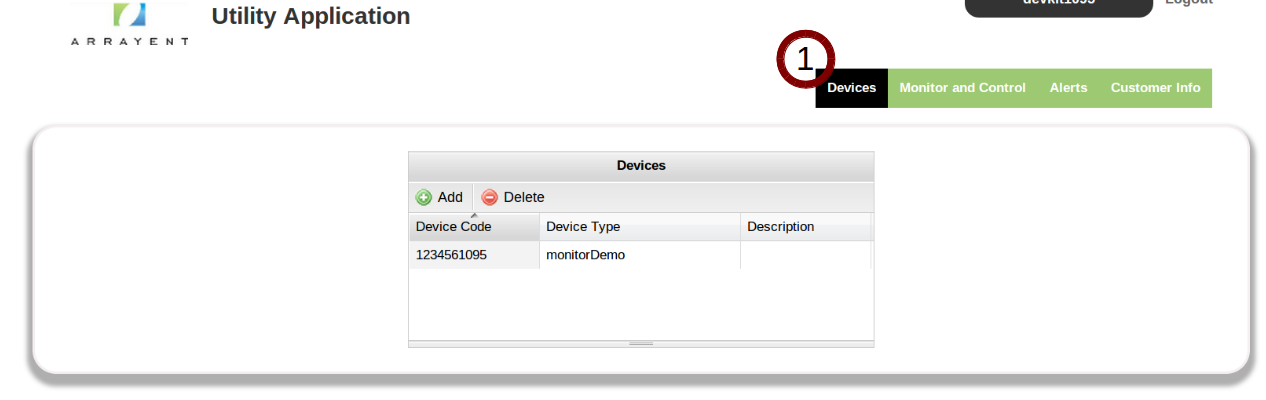
Next, follow the instructions below to add the device to your account.
- Click Add.
- For Device Name enter the value of device_name that Arrayent provided you in your DevKit credentials email.
- For Device Password enter the value of device_password that Arrayent provided you in your DevKit credentials email.
- For Device Type select monitorDemo.
- Click Save.
The device is now claimed by this Customer Account. No other Customer Account can access this device.
Controlling the LED
Follow the instructions below to learn how to use the Utility application to remotely control the LED on your evaluation board.
- Click the Monitor and Control tab to go to the Monitor and Control Page of the Utility Tool.
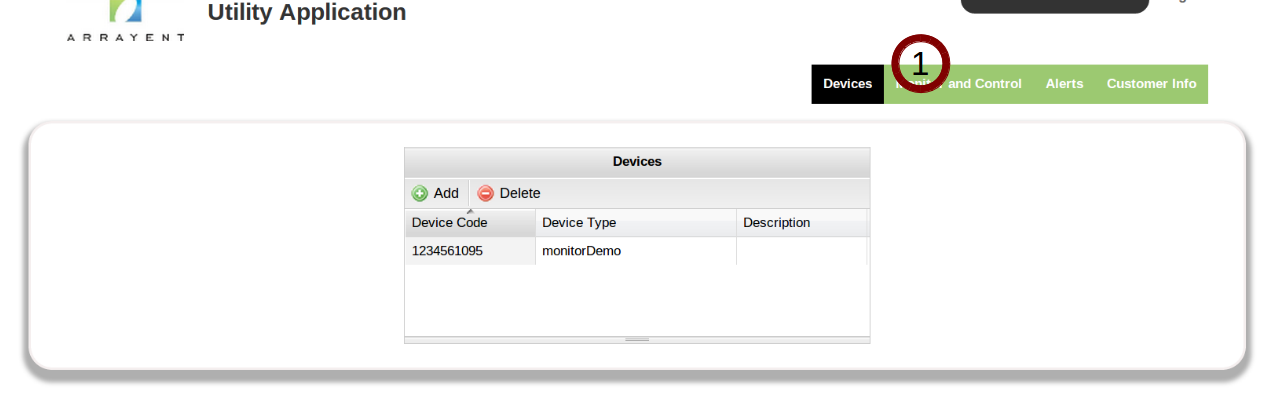
- On the Monitor and Control page of the Utility application, find the row containing the led1 attribute.
- Click the ON radio button in the led1 row.
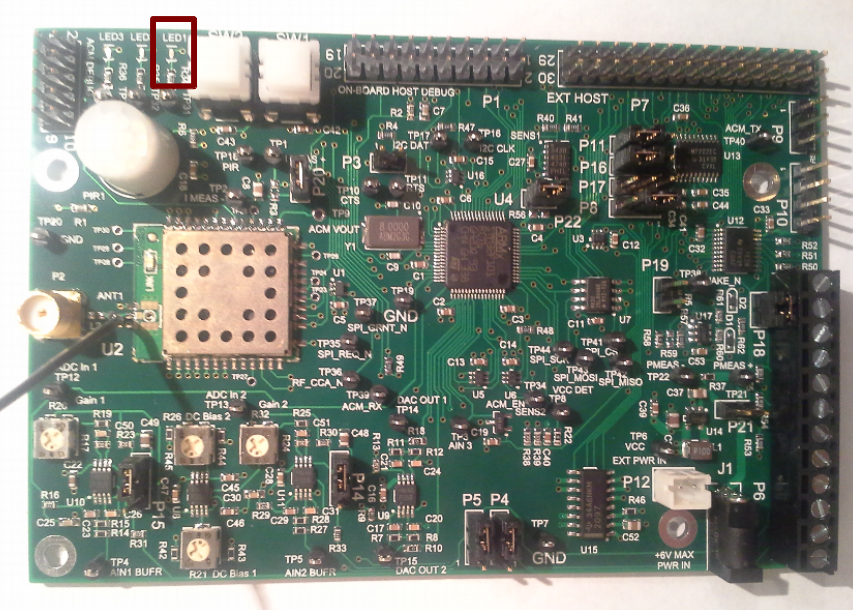
- Look at your evaluation board. The LED labeled “D1” should be on.
- Click the OFF radio button.
- Look at your board again. The LED should be off now.
Creating Alerts
In this section we create an automated event that sends an email to your email address when the LED of your evaluation board is turned on.
- Click the Alerts tab to go to the Alerts page of the Utility Tool.
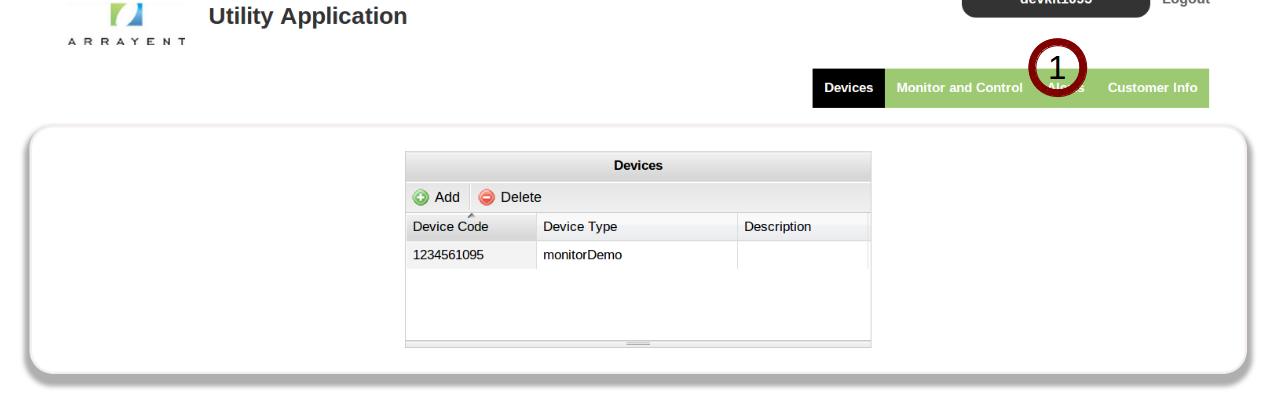
Follow the instructions below to implement the alert.
- Click Add.
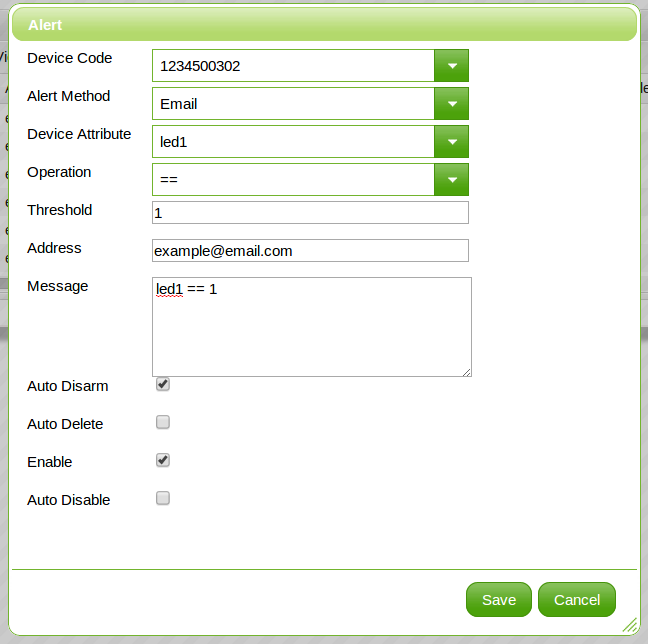
- Define your alert to match the screenshot below. Device Code must match the Device Name of your evaluation board. This is the value of device_name which was listed in your DevKit credentials email. Address must contain your email. This is the email address which the email will be sent to.
- Click Save.
The alert is now implemented. The next time that you use the Arrayent Utility application to turn on the evaluation board LED, the Arrayent Cloud will automatically send an email to the address you specified. Follow the instructions below to trigger the alert.
- Use the Utility application to set the value of the “led1” attribute to “1”, just like you did earlier.
Next Steps
Congratulations! You just learned how to use the Arrayent Connect Platform to monitor and control a connected device.
- Check out the source code of the Arrayent sample application to learn how to use the ACA in your own application. Relative to the file that you downloaded from Arrayent, the sample application directory is located at wmsdk_bundle-x.x.x.x/sample_apps/arrayent_monitordemo. Check out the Makefile and the main application source code (src/main.c) to learn how to include the ACA library into your own project.
- Read the ACA API Reference for complete details on the ACA’s features.
- Read the ACA Developer’s Guide for higher-level guides on implementing a connected device application that uses the ACA.
- Implement your own device data model and build an embedded host application that implements that data model. Use the Utility application to monitor and control the new application.
Getting the Marvell SDK
The Marvell SDK is included in the software file that you downloaded from Arrayent. But it is good to stay up to date with Marvell’s products and documentation.
Follow the instructions to be able to get product and documentation updates from Marvell.
- Open a web browser.
- Go to extranet.marvell.com.
- Register for an account.
- Request access to all documents and software related to the 88MC200 microcontroller (“Microcontrollers and Wireless MCU > 88MC200” and “Microcontrollers and Wireless MCU > 88MC200 Wi-Fi Microcontroller Platform”).