Quick Start Guide Cypress WICED DevKit
Introduction
In this guide you learn how to use the Arrayent Connect Platform to remotely monitor and control your Broadcom WICED evaluation board over the Internet.
Supported Hardware and Software
The following operating systems are supported:
- Windows 7
The following Broadcom (now Cypress) hardware and software are supported:
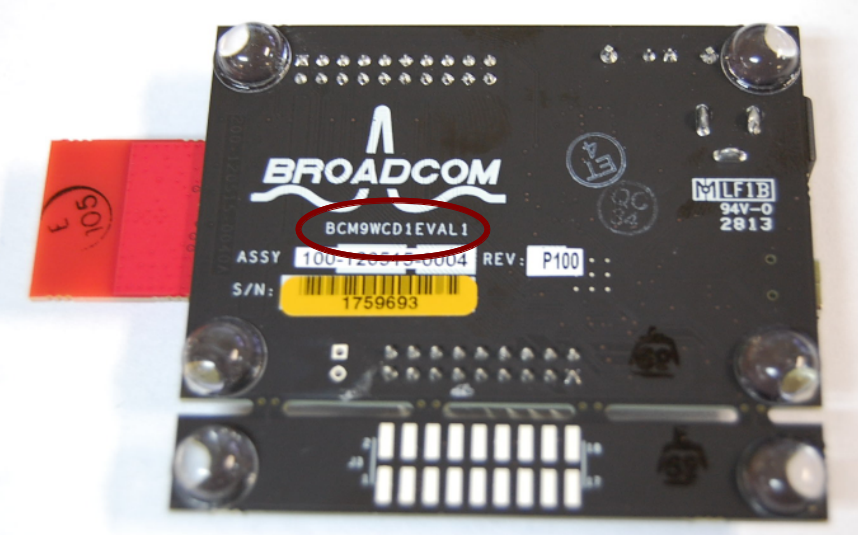
- Evaluation Board: BCM9WCD1EVAL1
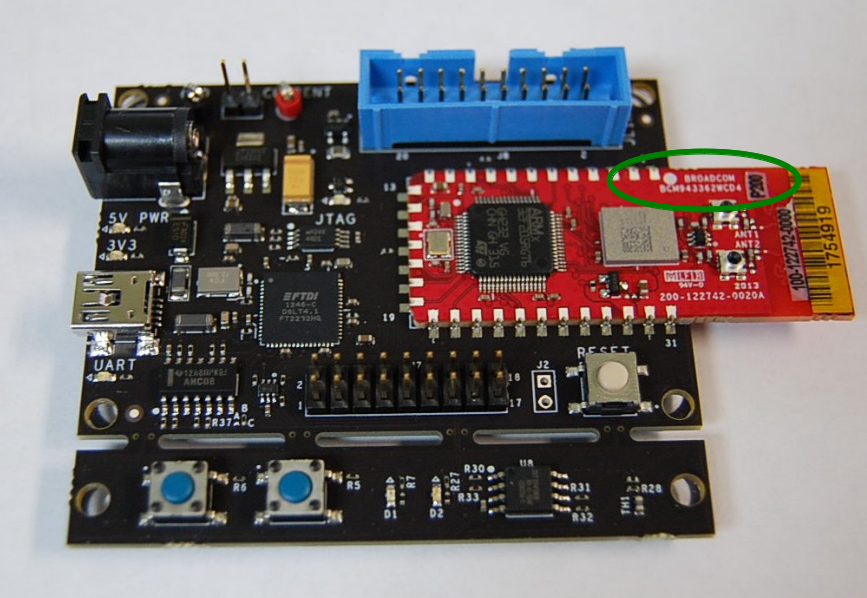
- WICED Module: BCM943362WCD4
- WICED SDK: 2.4.1
The sample application and the ACA do NOT work with WICED SDK 3.x.x. The sample application and/or Arrayent library may work with other versions of evaluation board, module, or SDK. But Arrayent cannot guarantee or verify this. Arrayent only supports the combination of hardware and software mentioned above.
Getting an Evaluation Board
The Broadcom WICED evaluation board is available for purchase from the following vendors:
Setting Up the Application
In this section you learn how to hardcode Wi-Fi and Arrayent credentials into the sample application source code, and then build and download the Arrayent sample application binary onto your evaluation board. You will need a command-line interface (CLI) and a text editor to complete this section. We assume that your CLI supports UNIX-style commands (
cd,ls, etc.), or that you know the equivalent commands for your operating system.
- Open the email that Arrayent sent you containing your DevKit credentials.
- Inside of the email there is a link to download software. Click the link to download the software.
- Extract the file. The file that you download will be compressed in Zip format. For sake of example we’ll assume you extract to the following locations:Windows:
C:\arrayent\WICED-SDK-2.4.1- Open
wifi_config_dct.hwith a text editor (such as Notepad on Windows). Assuming you extracted the software at the example locations this file would be located at the following location:Windows:C:\arrayent\WICED-SDK-2.4.1\Apps\demo\arrayent_monitordemo\wifi_config_dct.hNow we need to hardcode your Wi-Fi credentials into the source code of the sample application.
- For the value of
CLIENT_AP_SSIDenter your Wi-Fi Access Point SSID.- For the value of
CLIENT_AP_PASSPHRASEenter the passphrase for your Wi-Fi Access Point.- Save and close
wifi_config_dct.h.The sample application is now hardcoded to connect to this Wi-Fi Access Point. If you ever want to connect to a different Access Point, you will need to modifywifi_config_dct.hand re-compile / re-download the application.- Now open
main.c. This file is in the same directory aswifi_config_dct.h.- Find the implementation of the function
setup_arrayent().- Replace
YOUR_DEVICE_KEYwith thedevice_keyvalue listed in your email from Arrayent.- Replace
YOUR_DEVICE_NAMEwith thedevice_namevalue listed in your email from Arrayent.- Replace
YOUR_DEVICE_PASSWORDwith thedevice_passwordvalue listed in your email from Arrayent.- Check that your values look similar to the following:
c.device_aes_key = (const char*) "E7E34322115986C1F59E297C667F8FE7";
c.device_name = (const char*) "1234500500";
c.device_password = (const char*) "AB";
The exact values that you enter will be different, but each of the three values that you enter should be enclosed in parentheses like the example above.
- Leave the rest of the values as is.
- Save and close
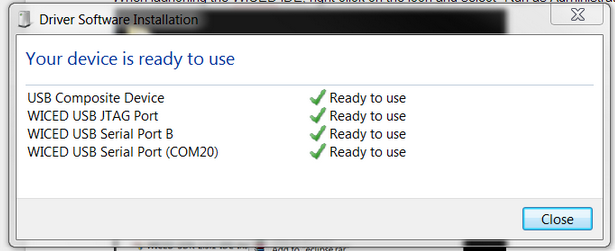
main.c.The sample application is now hardcoded with these device credentials. If you ever want to change the credentials, you will need to modify the source code and re-compile / re-download the application.- Plug in your Broadcom WICED development board to your computer with a USB Mini B cable. Wait a minute to let the device drivers install.If you click on the Installing device driver software popup, you can see the status of the device driver installation. The screenshot below is the result of successful device driver installation.
- Open a command line interface and change directories to the
WICED-SDK-2.4.1directory.Windows:cdC:\arrayent\WICED-SDK-2.4.1- Now execute the following command to build and download the sample application onto your development board.Windows:
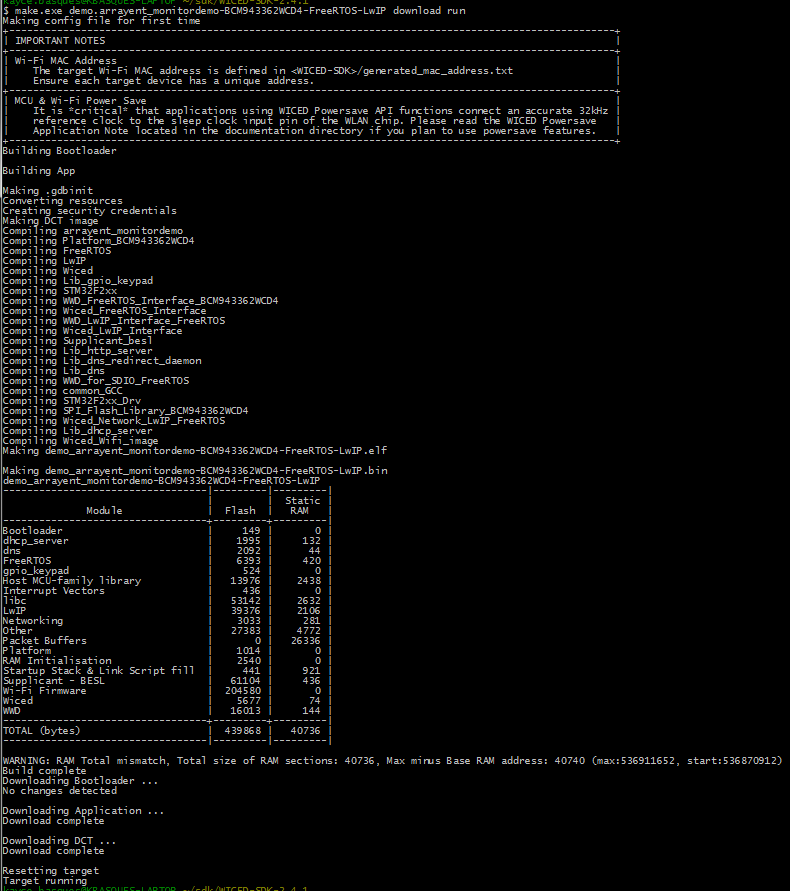
make.exe demo.arrayent_monitordemo-BCM943362WCD4-FreeRTOS-LwIP download run
make.exeis the name of the application that facilitates building the source code and downloading the binary to the board.demo.arrayent_monitordemoindicates the application to build, relative to theAppsdirectory (the period is a path delimiter, so the application is located atApps/demo/arrayent_monitordemo.BCM943362WCD4is the name of the Broadcom WICED module that we are compiling for.FreeRTOSis the name of the operating system that will be running on the board, andLwIPis the networking stack. Last,downloadandrunare special commands that instruct the WICED SDK to download the binary to the board and run it. Upon a successful build and download you will see output similar to the following screenshot:Configuring the Arrayent Cloud
In this section you use the Arrayent Configurator web application to create a device data model in the Arrayent Cloud. Then you create a Customer Account in the Arrayent Cloud, which you will use later on to monitor and control your device.
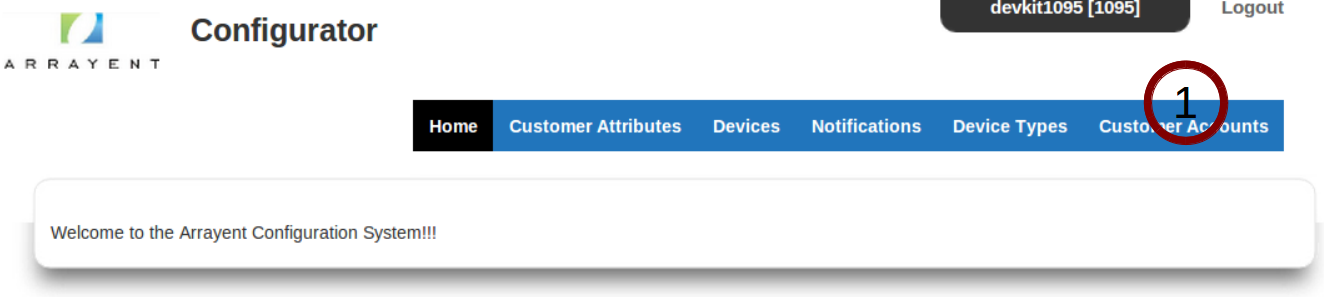
Logging In to the Configurator
Follow the instructions below to learn how to log in to the Arrayent Configurator web application.
Creating a Device Data Model
In this section you learn how to create a device data model using the Arrayent Configurator web application. In Arrayent terminology a device data model is referred to as a “Device Type”.
Creating the “monitorDemo” Device Type
In this section you learn how to create a device data model using the Arrayent Configuration web application. In Arrayent terminology we call the device data model a “Device Type”. The name of the Device Type we are creating will be called “monitorDemo”.
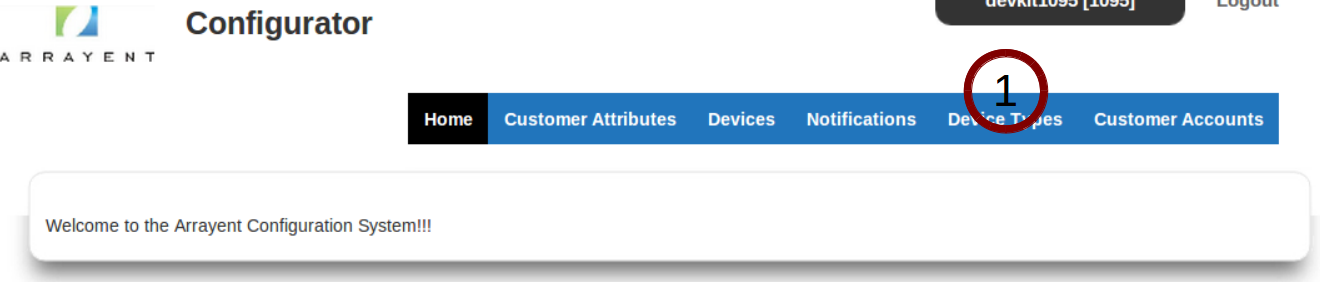
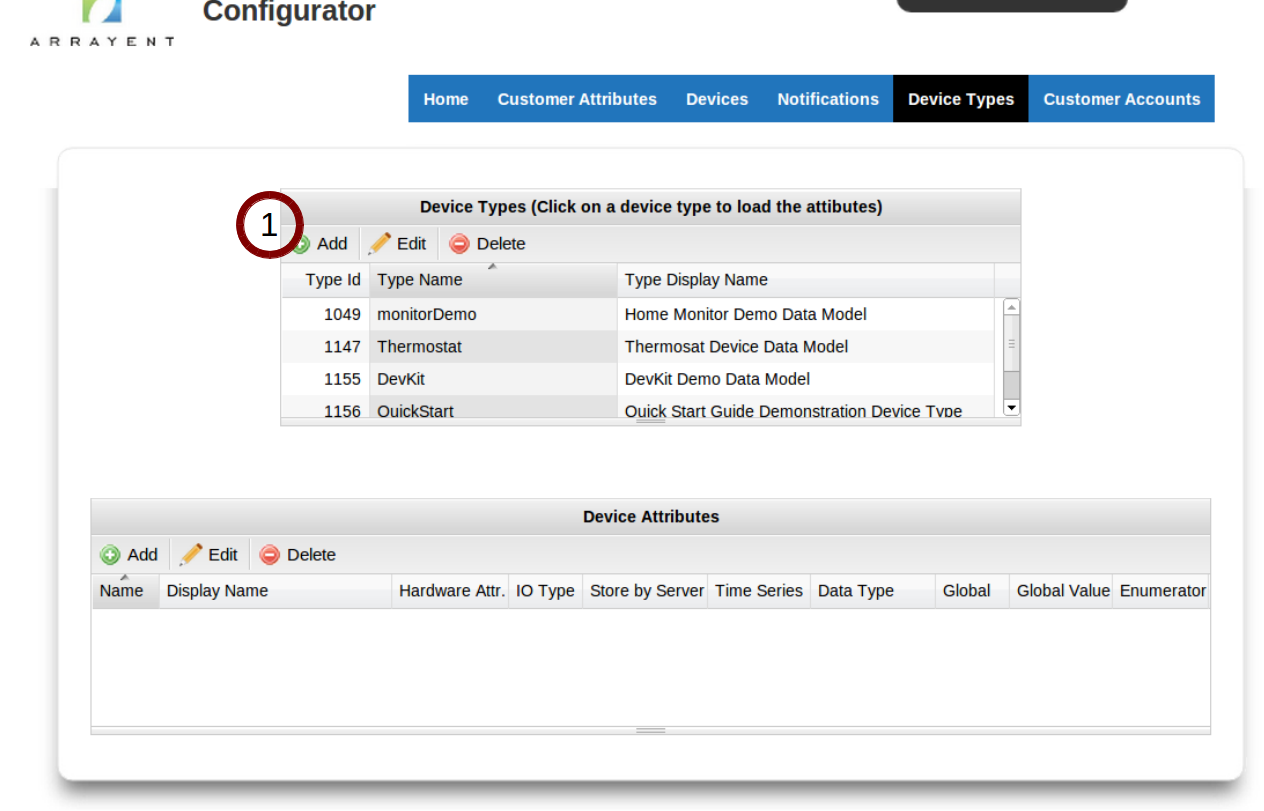
- Click the Device Types tab to go to the Device Types page of the Configurator.
This page enables you to create, modify, and delete device data models.
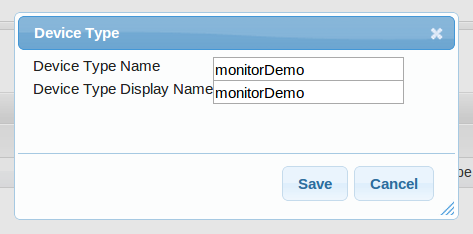
- Click Add.
- For Device Type Name enter
monitorDemo.- For Device Type Display Name enter
monitorDemo.- Click Save.
Creating Device Attributes
In this section you use the Configurator to define two Device Attributes, one called
led1and another calledgpi1.
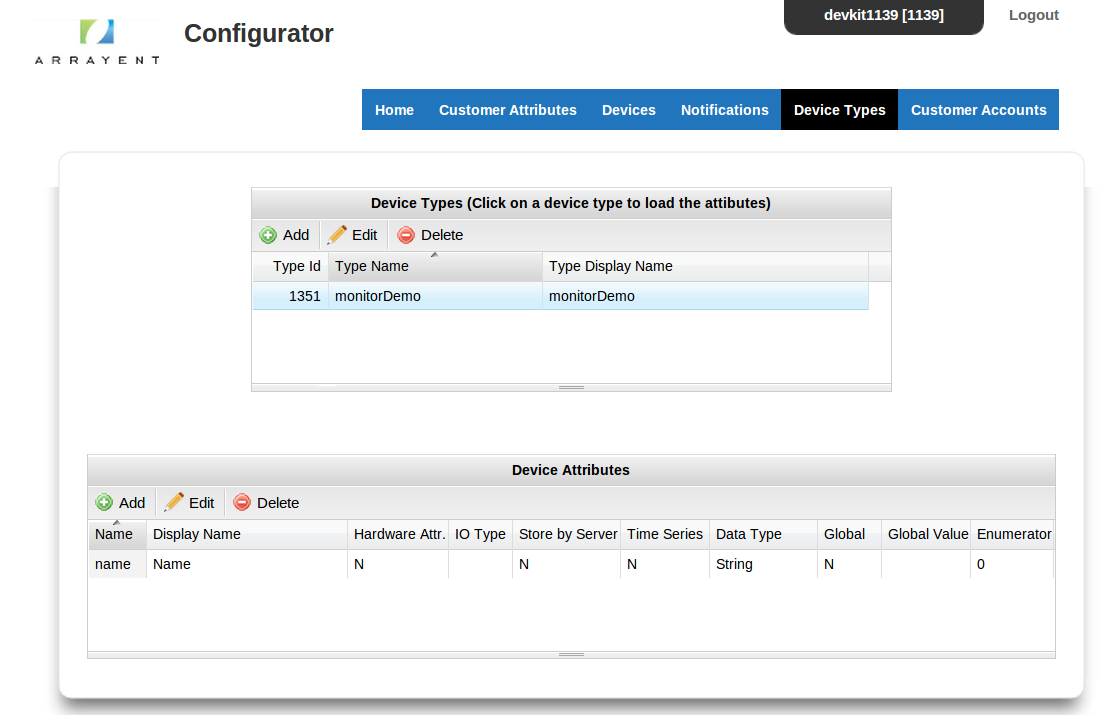
- Look at the Device Types page of the Configurator. You should see two tables. The top table is titled Device Types. The bottom is titled Device Attributes.
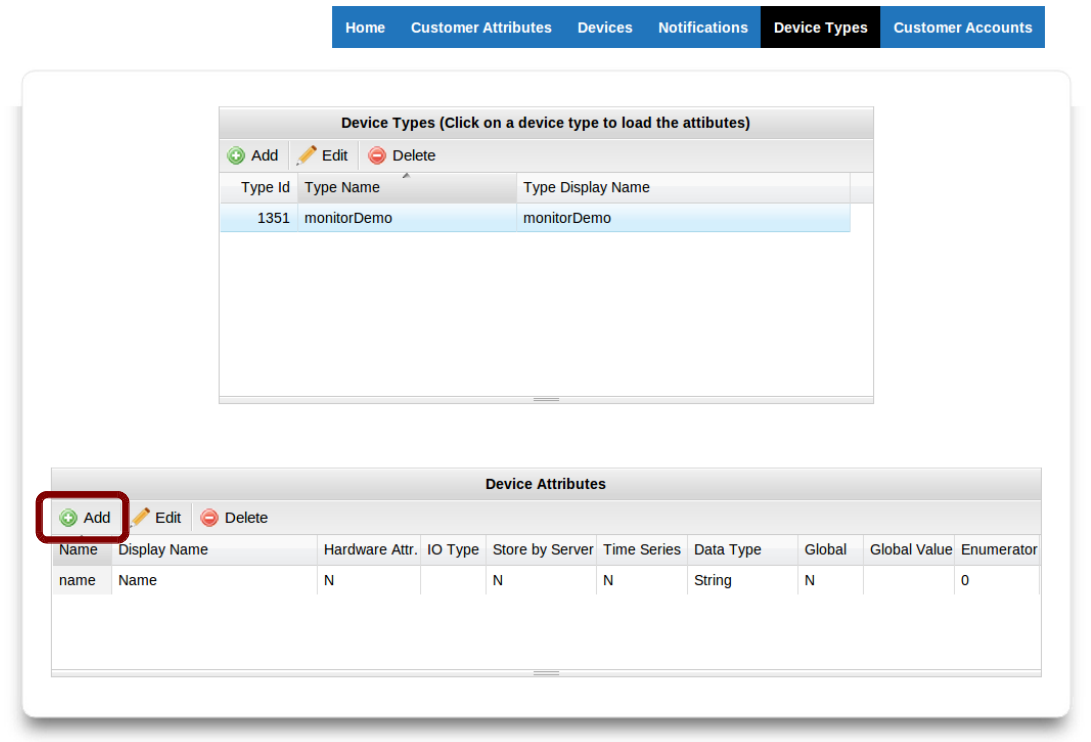
- Click on the row containing our new Device Type,
monitorDemo. This should highlight the row in blue.- In the bottom table titled Device Attributes click the Add button.
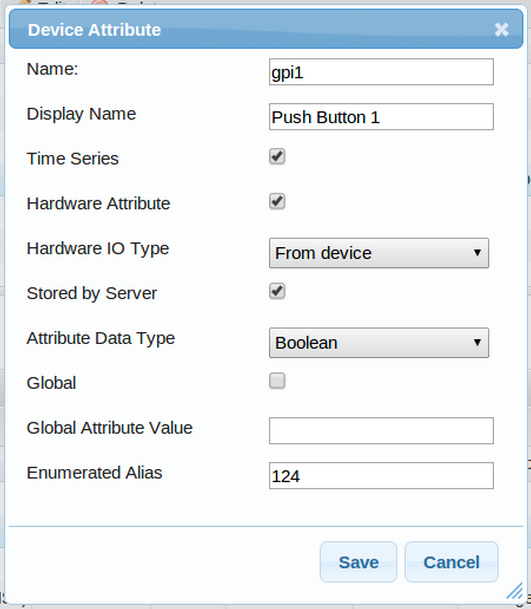
- Fill out the form so that your new Device Attribute matches the image below. Click Save when finished.
- Now repeat the process to create another Device Attribute that matches the image below.
See Device Types Guide for a description of how these fields affect a Device Attribute definition.
Creating a Customer Account for Monitor and Control
Follow the instructions in the next section to learn how to use the Configurator to create a new Customer Account in the Arrayent Cloud. Later on you will log in to the Arrayent Cloud as this Customer Account and then monitor and control your evaluation board via the Arrayent Utility web application.
Creating Customer Accounts
The Create Customer Account feature of the Configurator is accessed via the Customer Accounts page. To access that page:
- Click the Customer Account tab to go to the Customer Account Page of the Configurator.
Once at the Customer Accounts page, complete the following procedure to create the new Customer Account:
- Enter the username of the new account in the text field next to Customer Account Name.
- Select the checkbox. This will enable you to enter text in the textbox next to Customer Account Password.
- Enter the password of the new account.
- Leave Master Account Name empty.
- Enter values for the other user attributes as needed. All attributes other than username and password are optional.
- Click Save.
When you log in to the Utility app as the new Customer Account, you will need to provide the App ID (A.K.A. System Account ID) of the Customer Account. Customer Accounts inherit the App ID of the System Account that created the account. So if a System Account named “admin” with App ID “10” creates a Customer Account named “user”, the App ID of “user” will also be “10”.
Monitoring and Controlling the Evaluation Board
In this section you use the Arrayent Utility web application to monitor and control your evaluation board.
Logging In to the Utility Application
Follow the instructions below to learn how to log in to the Arrayent Utility web application.
Adding the Device to Your Account
In the Arrayent Cloud, a device (in this case, your evaluation board) must be owned by a Customer Account before it can be monitored and controlled.
- Click the Devices tab.
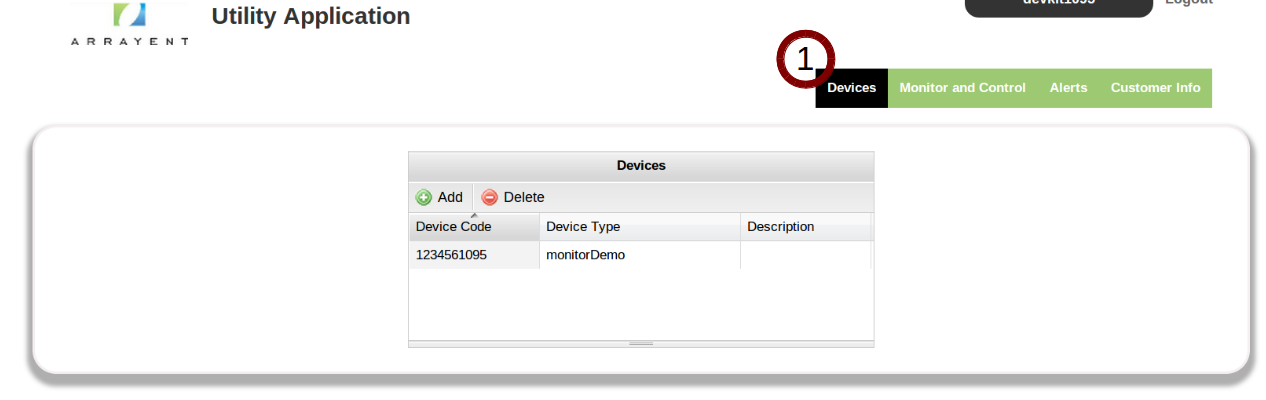
Next, follow the instructions below to add the device to your account.
- Click Add.
- For Device Name enter the value of
device_namein your email from Arrayent. - For Device Password enter the value of
device_passwordin your email from Arrayent. - For Device Type select
monitorDemo. - Click Save.
The device is now claimed by this Customer Account. No other Customer Account can access this device.
Controlling the LED
Follow the instructions below to learn how to use the Utility application to remotely control the LED on your evaluation board.
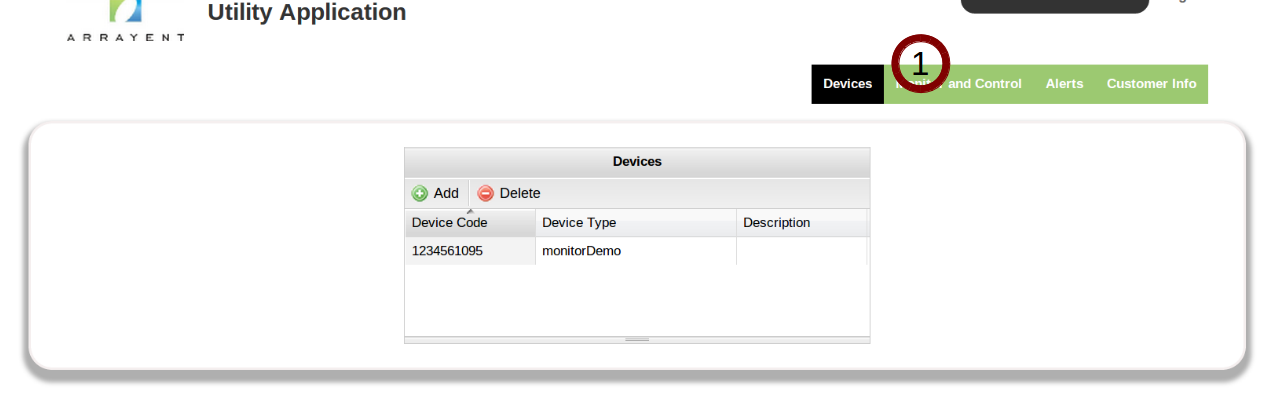
- Note the Device Name dropdown menu. If you had multiple devices you would select your device from this menu.
- Click the Monitor and Control tab.
- Find the row containing the led1 attribute.
- Click the ON radio button in the led1 row.
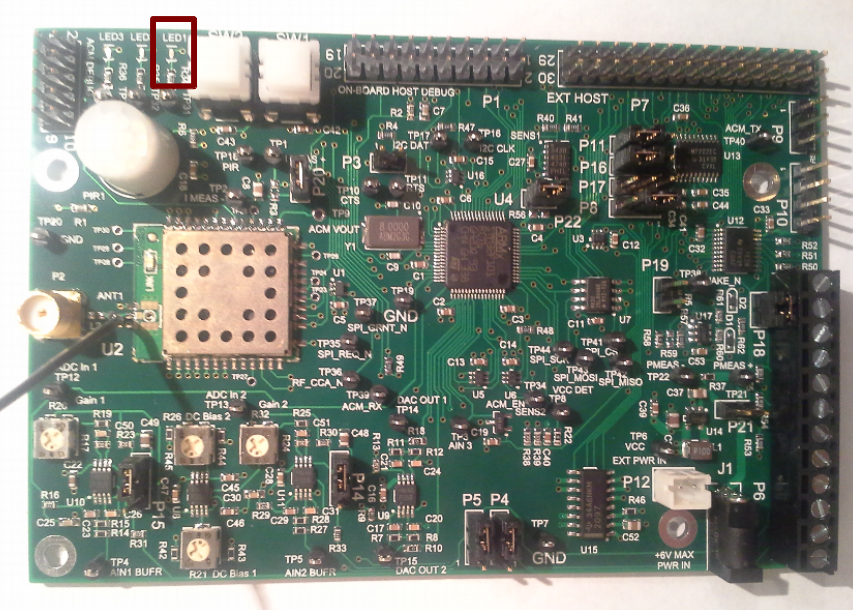
- Look at your evaluation board. The LED labeled “D1” should be on.
- Click the OFF radio button.
- Look at your board again. The LED should be off now.
Monitoring Push Button Events
In this section you use the Utility application to monitor push button events on your evaluation board.
- You should still be on the Monitor and Control page of the Utility application. If not, go back to that page now.
- Find the row containing the
gpi1attribute. - Press and hold the push button on your evaluation board labeled SW1.
- While holding the push button, look at the ACTIVE VALUE column of
gpi1on the Utility application. You should see the slider bar value change toON.If you don’t see a slider bar, try reloading the page. - Release the push button. On the Utility application you should see the value change back to
OFF.
Creating Alerts
In this section we create an automated rule that sends an email to your email address when the push button of your evaluation board is pressed.
- Click the Alerts tab.
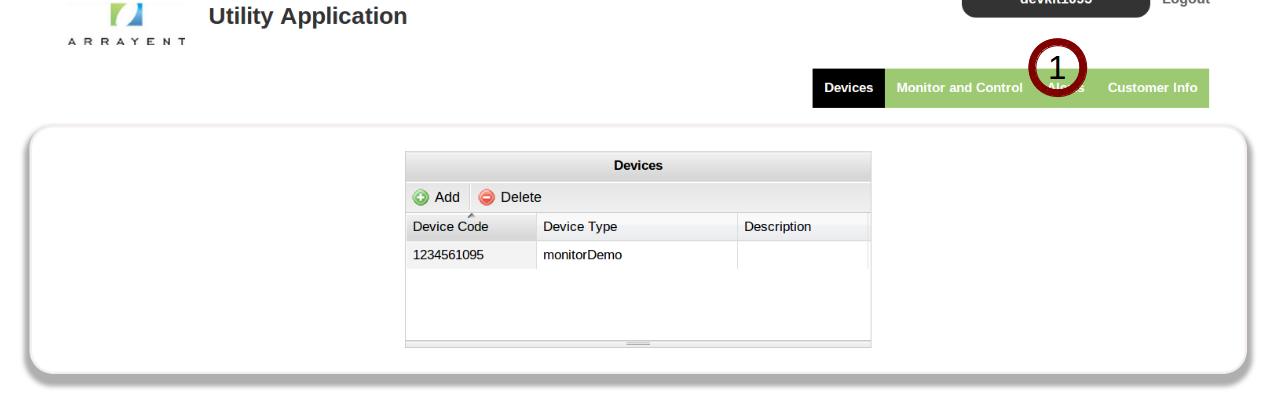
- Click Add.
- Define your alert to match the screenshot below. Device Code must match the Device Name of your evaluation board (the
device_namevalue in your email from Arrayent).Address must contain your email. This is the email address which the email will be sent to.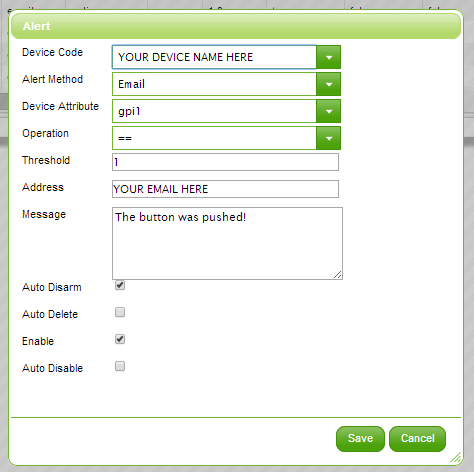
- Click Save.The alert is now implemented. The next time that you press the push button of your evaluation board, the Arrayent Cloud will automatically send an email to the address you specified.
- Press and hold the push button of your evaluation board for at least one second.
As an optional challenge, try to create an email alert that sends an email to you when led1 equals 0. The appendix of this document shows you how to do this, if you need help.
Next Steps
Congratulations! You just learned how to use the Arrayent Connect Platform to monitor and control a connected device.
- Read the Architecture Overview to understand how the Arrayent Connect Platform enables connectivity in your devices.
- Check out the source code of the Arrayent sample application to learn how to use the ACA in your own application. Relative to the file that you downloaded from Arrayent, the sample application directory is located at
WICED-SDK/Apps/demo/arrayent_monitordemo. Check out the Makefile (arrayent_monitordemo.mk) and the main application source code (main.c) to learn how to include the ACA library into your own project. - Read the ACA API Reference for complete details on the ACA’s features.
- Read the ACA Developer’s Guide for higher-level guides on implementing a connected device application that uses the ACA.
Appendix
Creating an email alert for led1
If you were stumped on how to create an email alert that is triggered when led1 equals 1, here is the answer:
- Go to the Utility application.
- Click the Alerts tab.
- Click the Add button.
- Define your alert to match the screenshot below.
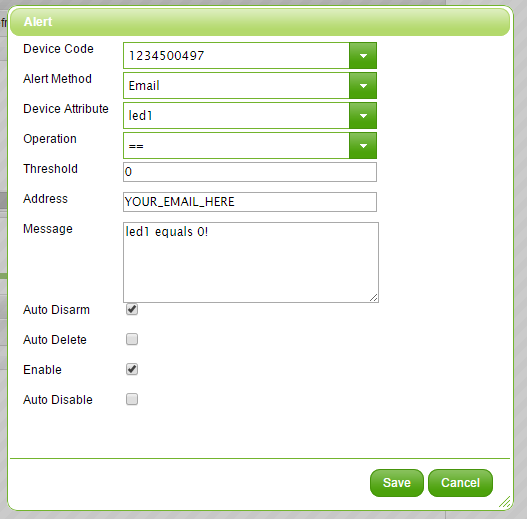 You need to replace
 YOUR_EMAIL_HEREwith your email address. Device Code should match thedevice_namevalue in your email from Arrayent.
Setting up the WICED development environment
We designed our Quick Start Guide to be as painless as possible. The goal is to give you a hands-on demonstration of Arrayent technology, not teach you how to use Broadcom’s IDE and SDK. In this section we provide more instructions on how to set up the WICED IDE. You may encounter problems setting up your environment. Where appropriate, Arrayent will point out relevant Broadcom documentation that may help you, but because these problems are specific to your computer and Broadcom’s software, we will not be able to troubleshoot any problems you encounter in this section. To demonstrate how to use the WICED IDE, we will create a simple sample application that incrementally prints a message to the Arrayent Cloud.
- Download WICED IDE version 2.4.1. Versions 3.x.x are not currently supported.The file that you download should be called
WICED-SDK-2.4.1-IDE-Installer.exe. At the time of writing you can download the Windows version at the following URL: http://community.broadcom.com/docs/DOC-1187. If this URL breaks over time, just log in to community.broadcom.com (registration required) and search for WICED IDE 2.4.1. - Double-click on
WICED-SDK-2.4.1-IDE-Installer.exeto start the installer. - Install the IDE with all of the default settings.
- Open the WICED IDE.
- In Project Explorer right-click on WICED-SDK/Apps/Demo and hover over New then select Folder.
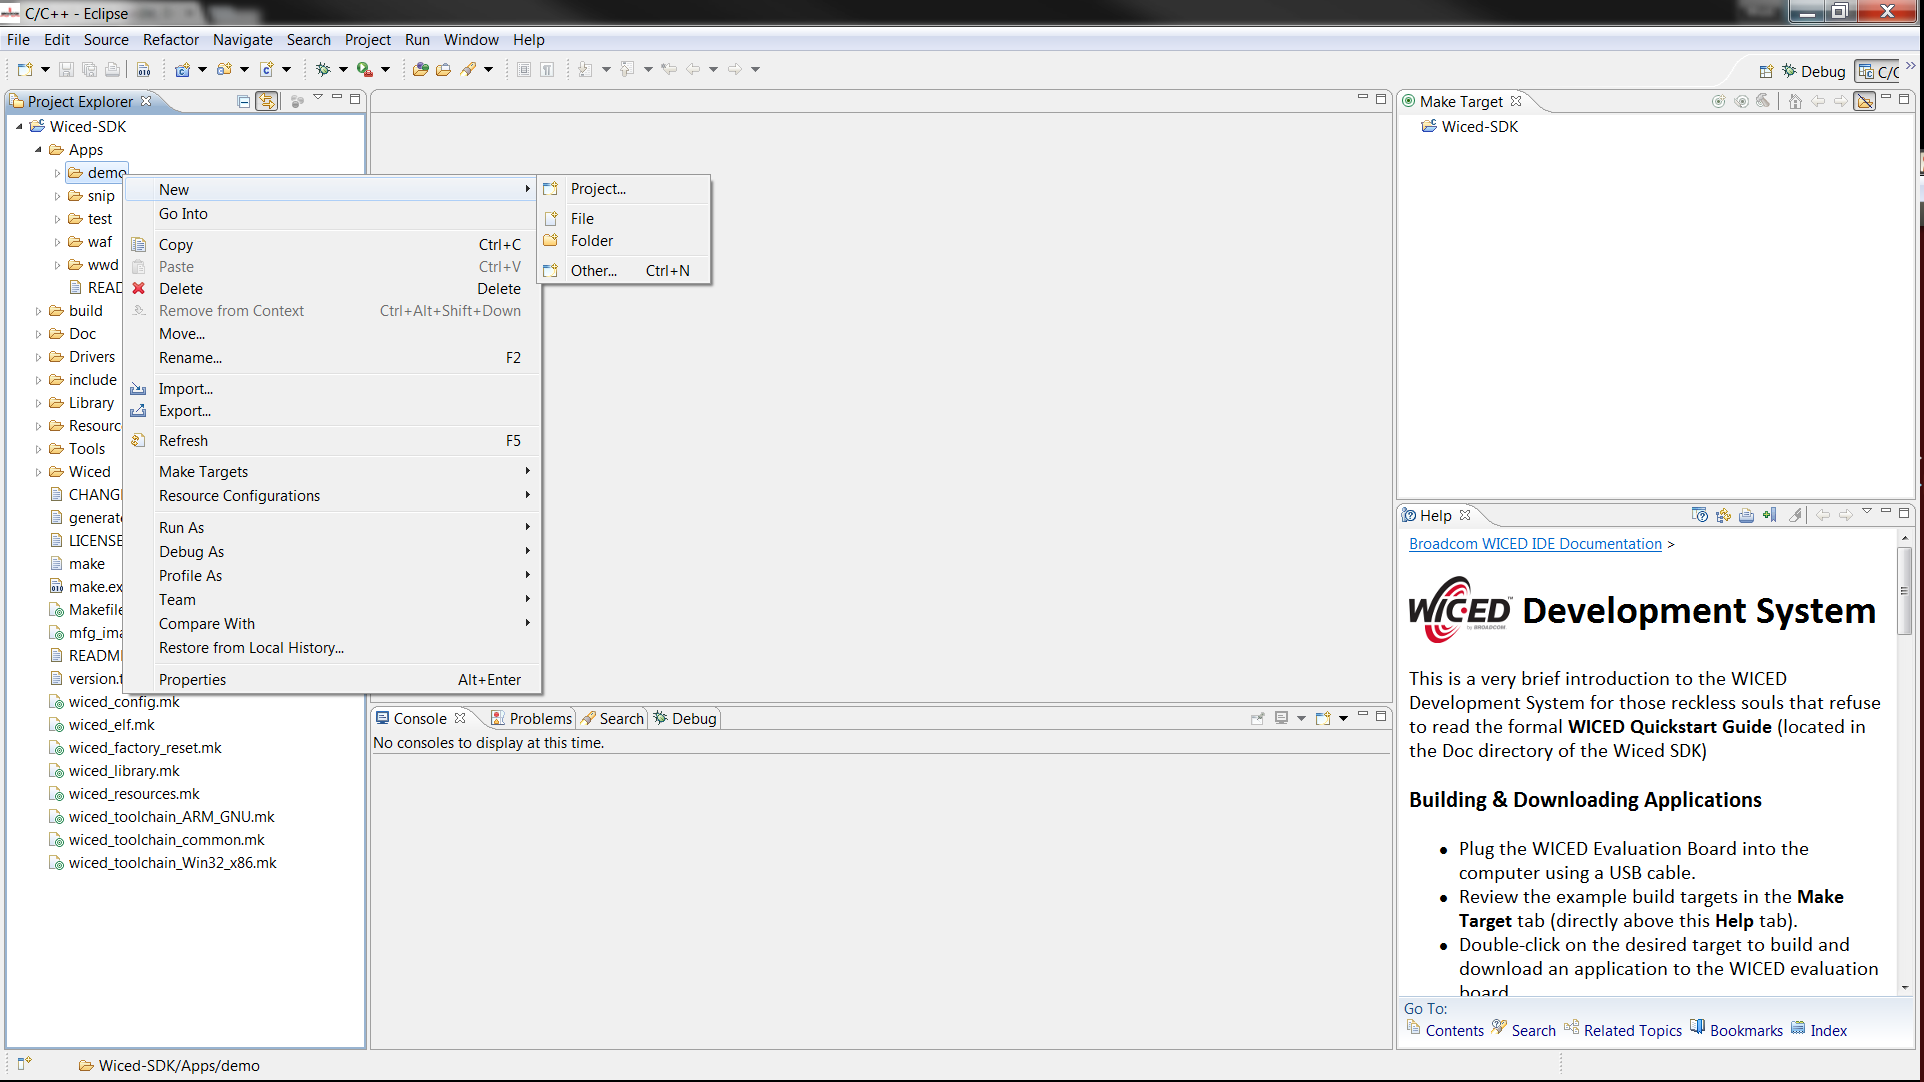
- Name the folder
hello_arrayent. - In Project Explorer right-click on your new hello_arrayent folder and hover over New then select File.
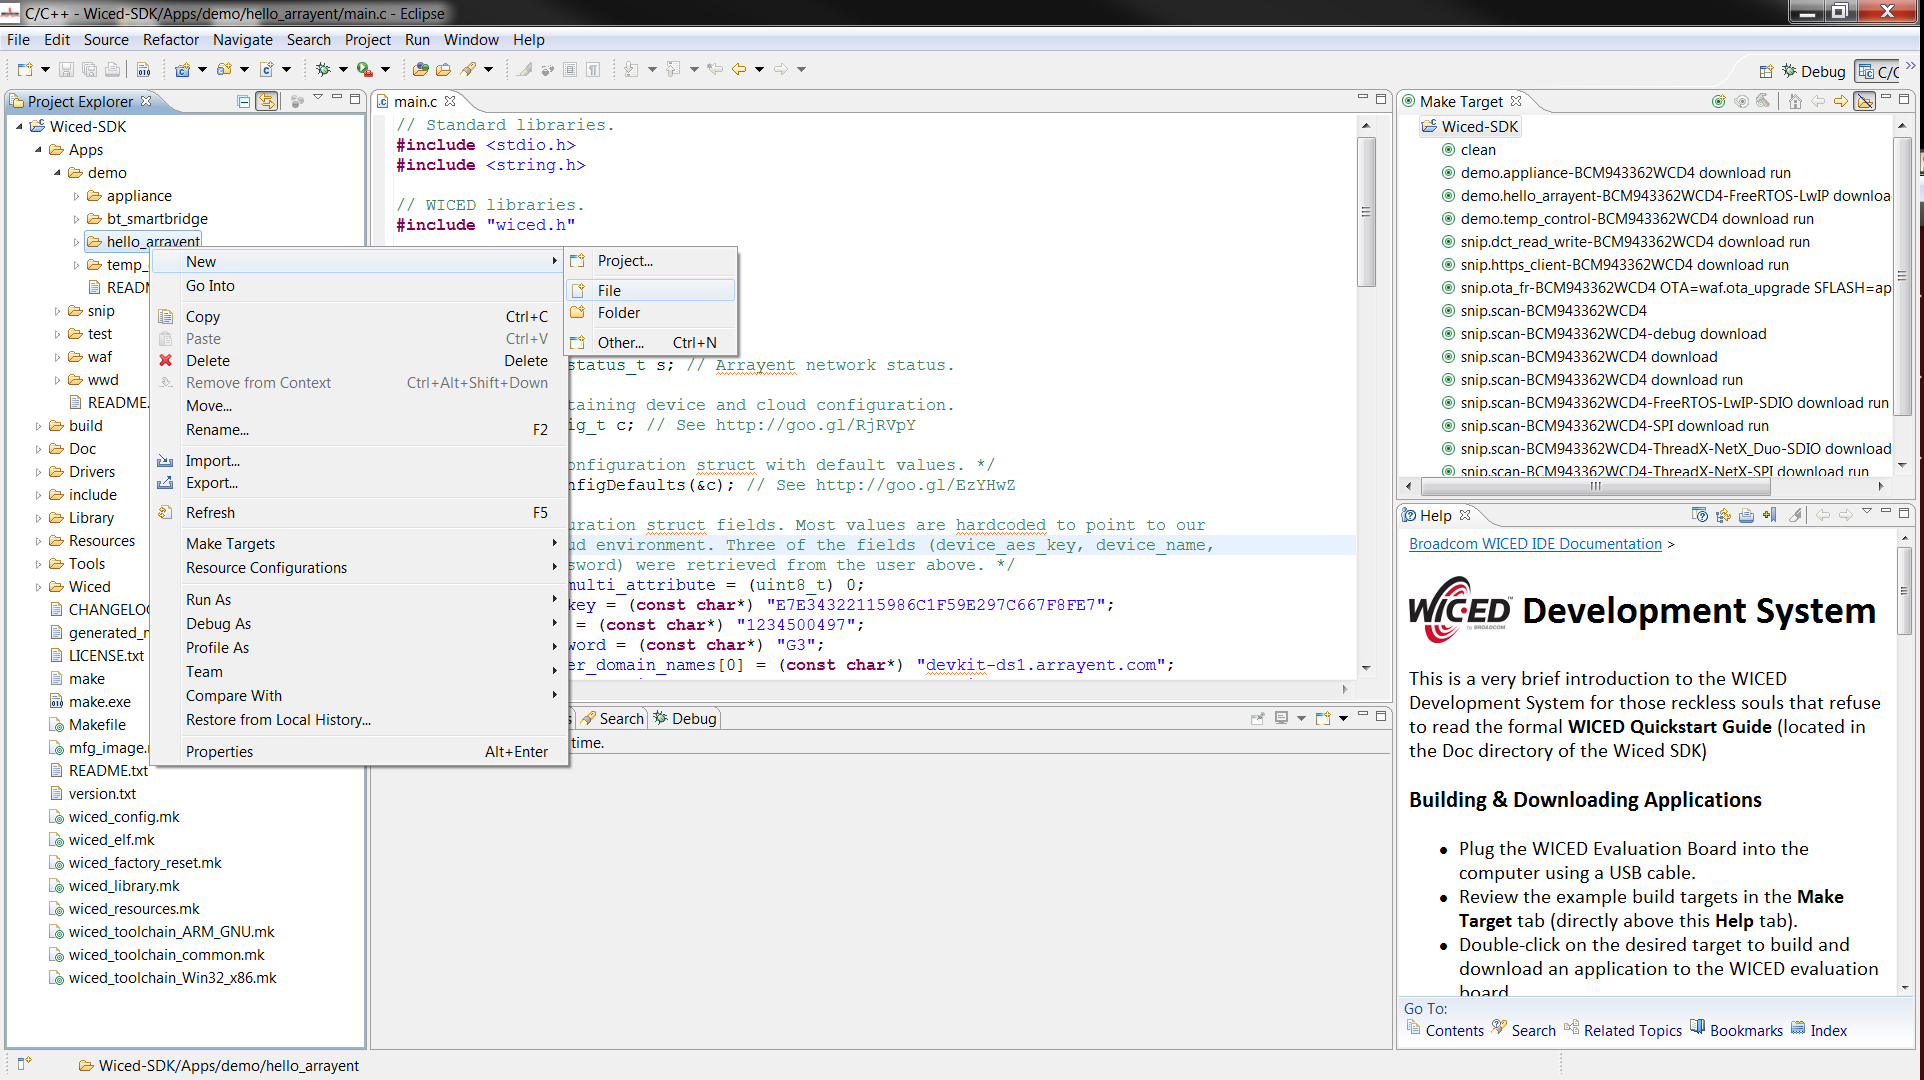
- Name the new file
hello_arrayent.c. - Double-click on
hello_arrayent.c. This will open the file in the center window of the IDE (we will call this window the “Editor” window). - Copy and paste the following source code into
hello_arrayent.c. - Modify
c.device_aes_key,c.device_name, andc.device_passwordand save the changes. - Now repeat the file creation process and create a new file called
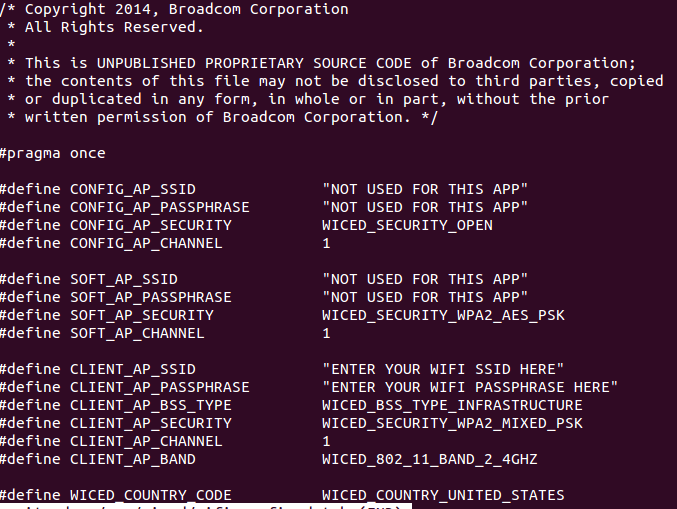
wifi_config_dct.h. This file should be in the same folder ashello_arrayent.c. - Copy and paste the following source code into
wifi_config_dct.h/* Copyright 2014, Broadcom Corporation * All Rights Reserved. * * This is UNPUBLISHED PROPRIETARY SOURCE CODE of Broadcom Corporation; * the contents of this file may not be disclosed to third parties, copied * or duplicated in any form, in whole or in part, without the prior * written permission of Broadcom Corporation. */ #pragma once #define CONFIG_AP_SSID "NOT USED FOR THIS APP" #define CONFIG_AP_PASSPHRASE "NOT USED FOR THIS APP" #define CONFIG_AP_SECURITY WICED_SECURITY_OPEN #define CONFIG_AP_CHANNEL 1 #define SOFT_AP_SSID "NOT USED FOR THIS APP" #define SOFT_AP_PASSPHRASE "NOT USED FOR THIS APP" #define SOFT_AP_SECURITY WICED_SECURITY_WPA2_AES_PSK #define SOFT_AP_CHANNEL 1 #define CLIENT_AP_SSID "YOUR_WI-FI_SSID" #define CLIENT_AP_PASSPHRASE "YOUR_WI-FI_PASSPHRASE" #define CLIENT_AP_BSS_TYPE WICED_BSS_TYPE_INFRASTRUCTURE #define CLIENT_AP_SECURITY WICED_SECURITY_WPA2_MIXED_PSK #define CLIENT_AP_CHANNEL 1 #define CLIENT_AP_BAND WICED_802_11_BAND_2_4GHZ #define WICED_COUNTRY_CODE WICED_COUNTRY_UNITED_STATES
- Modify
CLIENT_AP_SSIDandCLIENT_AP_PASSPHRASEand save the changes. - Create another new file. Name it
hello_arrayent.mk. - Copy and paste the following source code into
hello_arrayent.mk.# Copyright 2014, Broadcom Corporation # All Rights Reserved. # This is UNPUBLISHED PROPRIETARY SOURCE CODE of Broadcom Corporation; # the contents of this file may not be disclosed to third parties, copied # or duplicated in any form, in whole or in part, without the prior # written permission of Broadcom Corporation. NAME := hello_arrayent $(NAME)_SOURCES := hello_arrayent.c # Libraries to include. # Directories must be relative to WICED SDK Libraries directory. # E.g. /home/john/WICED-SDK-2.4.1/Library/arrayent/libaca_wiced $(NAME)_COMPONENTS := arrayent/libaca_wiced # Magic Wi-Fi configuration file. It appears to need this exact name # or else WICED's makefile will complain. WIFI_CONFIG_DCT_H := wifi_config_dct.h
- In the Make Target window right-click on Wiced-SDK and left-click New.
- For Target Name enter
demo.hello_arrayent-BCM943362WCD4-FreeRTOS-LwIPdownloadrun. - Leave the other options as is.
- Click OK.
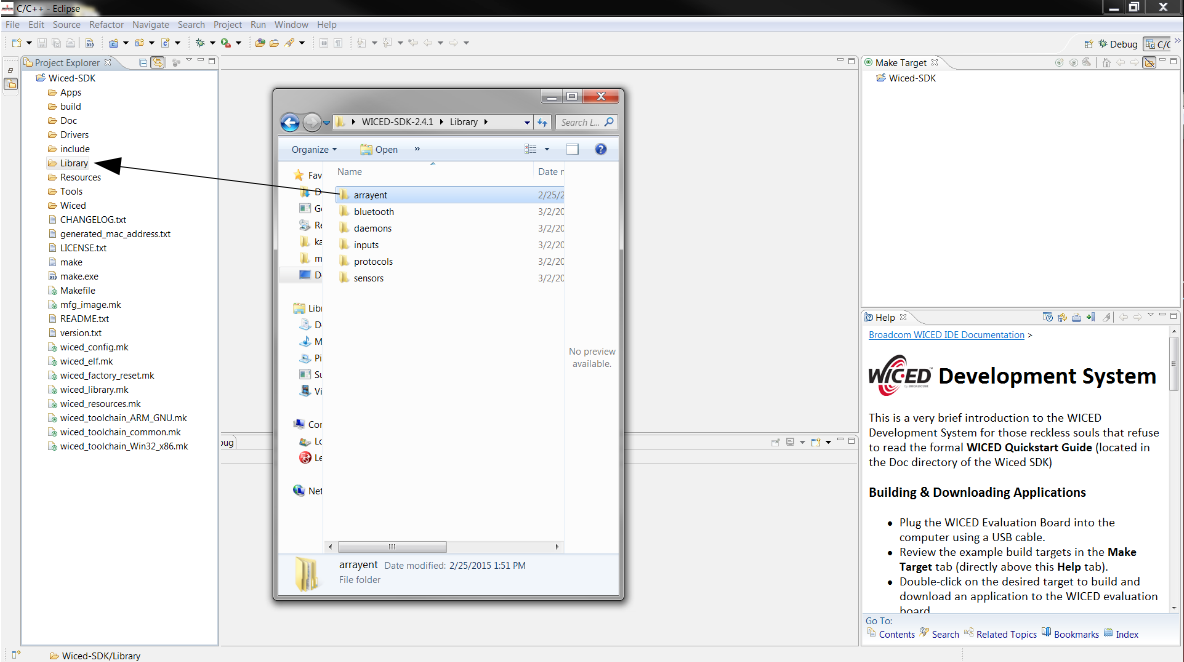
- When you received your DevKit you downloaded software from Arrayent. Open that folder and drag the contents ofLibrary/arrayent into the Library folder of your WICED IDE.
- Plug in your development board to your computer with a USB Mini B cable.
- In the Make Target window double-click on your new Make target. The WICED IDE will compile the application and download it to your development board.
- Log in to the Configurator and add the following Device Attribute to your
monitorDemoDevice Type.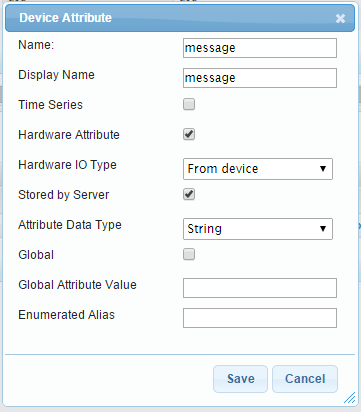
- Log in to the Utility application and monitor your device. You should see the value of the
messageattribute updating every 5 seconds.